Setting Up Node MCU
NodeMCU is an inexpensive WiFi board based on esp8266. We can write lua scripts to run on NodeMCU. Setting up is very easy, we just need two tools, One is firmware updater (Flaser) and the IDE to write the lua scripts.
You can find the tools here. These IDE uses .NET, I faced some problems with it on XP. There is one JAVA IDE available here.You need to grab a latest version of the image for the nodeMCU. before doing any thing I would recommend you to update your firmware. You can grab the latest release here (The firmware is no more released in binaries).this cloud service will help you generate a custom build. You need a flasher tool as well
Updating the firmware:
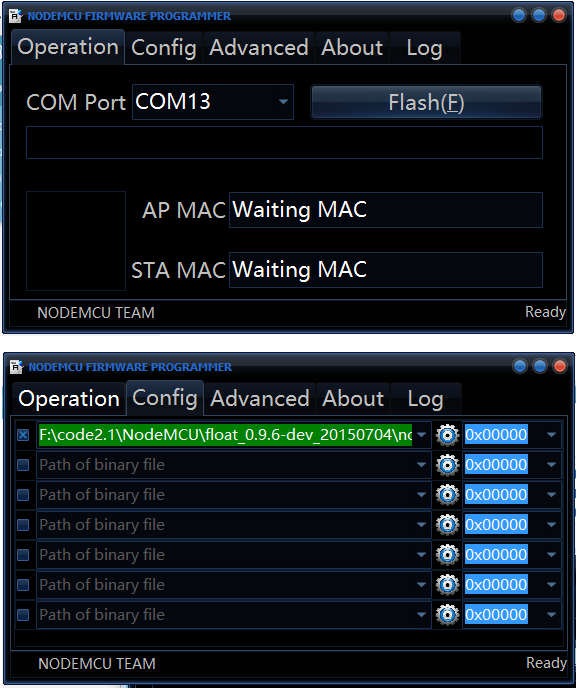
Check the COM port and Click on settings button to select the firmware. Click on Flash button to load the firmware.
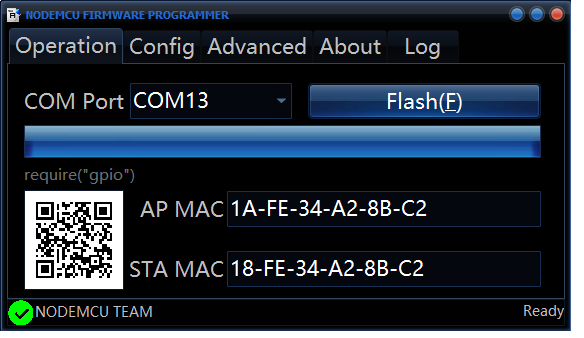
If the firmware is updated successfully, then you should get a green tick as shown above. Now we will run a simple Hello World program.
Now open the “Node MCU Studio”. Select the COM port,and click on connect to connect to the module.Open a new file and type the following
print("Hello World")
Save the file as test.lua,then click on download button. The file will be wrriten to the module. If you click on RUN button, it will show all the available files in the module. Select test.lua, your message will be displaced in the console.


Hi SankarCheppali, Please tell me how i can falsh nodemcu firmware into a ESP8266
Hi,
Refer this post on how to load NodeMCU firmware to ESP8266
http://icircuit.net/loading-node-mcu-firmware-esp8266-01/1574
Hello,
I keep getting an error when uploading hello world saying that the “startIndex cannot be larger than length of sting”… Do you know what would be causing this?