Building IoT application using ESP32 and Micropython in 10 Steps
Objective : In this blog we will demonstrate how to build end to end IoT application using ESP32 board and MicroPython as language.
What is required:
ESP32 development board
DHT22 sensor
SSD1306 OLED display
Raspberry Pi
Windows/Linux OS to connect to ESP32 board via serial port
Architecture:
Before explaining architecture, let us understand why we choose these components
Why ESP 32 board: Good specs at decent cost for hackers Dual core , Wifi, 3.3 V logic, Bluetooth
Why Micropython: High level language, Simple and clean, REPL, easy for experimentation and prototyping
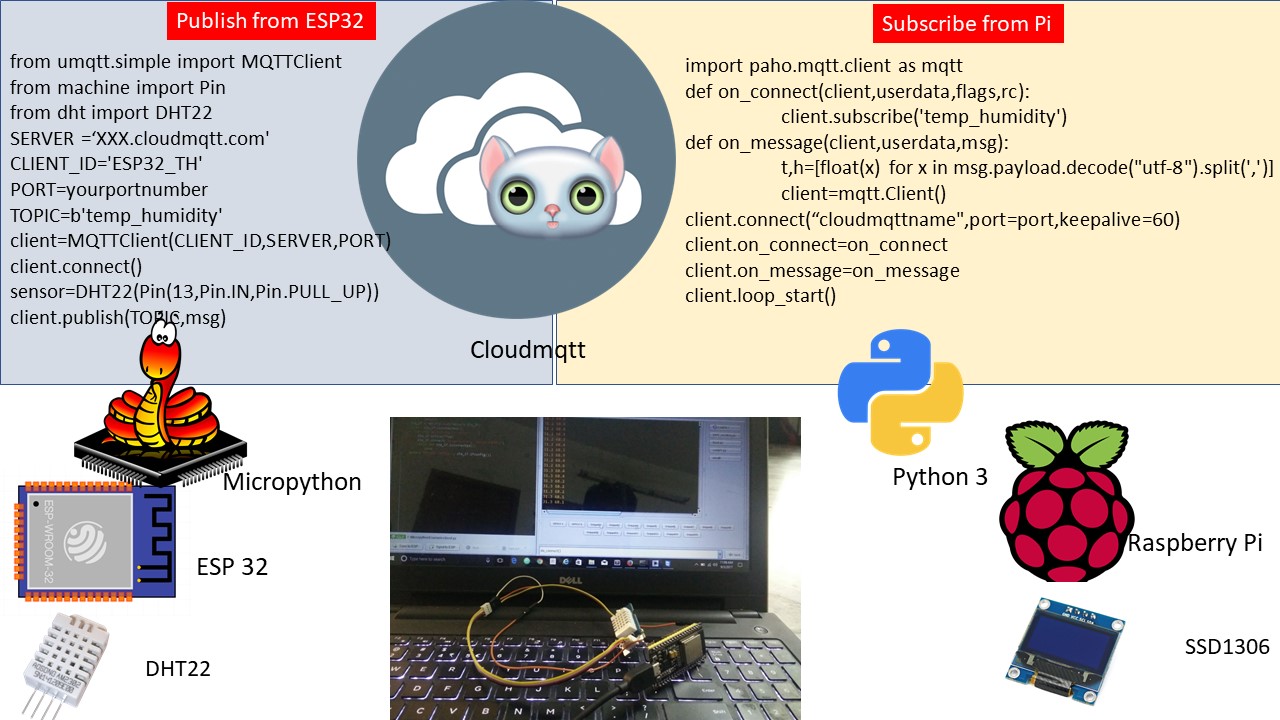
This architecture has two components
Publish sensor data (temperature) from Edge on ESP32 using micropython
Subscribe sensor data (temperature) from Raspiberry Pi and display on SSD1306 using python3
Edge side setup (ESP32 setup):
Step 1: Refer earlier blog to setup and get into REPL prompt.
There are three ways to get into this prompt
- Using plain serial port communication (cp2102 drivers)
- Using editors like esplorer
- Using Rshell
- Using Adafruit Ampy
Step 2:
Connect to Wireless network
Step 3: Connect DHT22 with ESP 32
DHT 22 has 4 pins, Pin 1 Vcc on the DHT22 is connected to a 3.3V pin on the ESP32. Pin 2, the DHT-22 data line is connected to GPIO13 Pin 3 is left disconnected and pin 4 ground is connected to a ground on the ESP32.
Step 4: MQTT Publish code
If umqtt is not there , install using this command
upip.install('micropython-umqtt.simple')
Step 5: Verify edge side code
On the serial console, check temperature and humidity values are showing
Pi Side setup
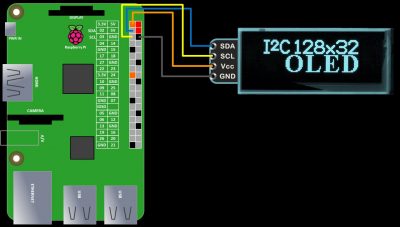
Step 6: Setting up Pi
Install python3 and connect SSD1306
Step 7 : Subscribe code
Step 8 :Display data code via SSD OLED display
Verify the reading at SSD console connected with Pi
Step 9 : Also verify the readings from Cloudmqtt console to check the messages are published and subscribed
Step 10 : Take the ESP32 setup with Battery and put it in another place,where temperature and humidity is different. Check SSD console to verify.
References:
https://github.com/gloveboxes/ESP32-MicroPython-BME280-MQTT-Sample
Related Posts


About The Author
Sivaiots
Enterprise Architect , Tinkerer
I want to communicate ESP32 with my mobile app. I done micopython coding as follows :
import network
ap = network.WLAN(network.AP_IF)
ap.active(True)
ap.config(essid=’ESP32′)
ap.config(authmode=3, password=’123456789′)
In this code Access point is created and it is visible in my android mobile.
But when i connect my mobile to access point it is showing “saved” message instead of “connected” even though i have entered correct password.
I followed same procedure using arduino code then i am able to connect my mobile with access point created by esp32. Any help is highly appreciable .