Arduino : Getting Started with Raspberry Pi Pico 2
Raspberry pi released Pico 2 board based on the new RP2350 dual core microcontroller. The board similar to the original Pico board, but with the new RP2350 controller. The new RP2350 has two ARM Cortex-M33 cores and two Hazard3 RISC-V cores, user can choose between these two architectures. In this post will see how to setup Arduino IDE to program Pico 2 and flash blinking LED program. The board is both software and hardware compatible with the Pico.

Pico 2 features
- RP2350A Controller at 150MHz
- Winbond W25Q32RV 4MB external flash and 520KB multibank SRAM
- 30 GPIOs (Only 4 of these can support ADC)
- micro usb port for programming
- 3-pin ARM Serial Wire Debug (SWD) port
The micro usb could have been a USB-C port, already many development boards are migrated to USB-C ports. The only reason I am keeping a micro usb cable around is for my kindle, which came in handy for this board.
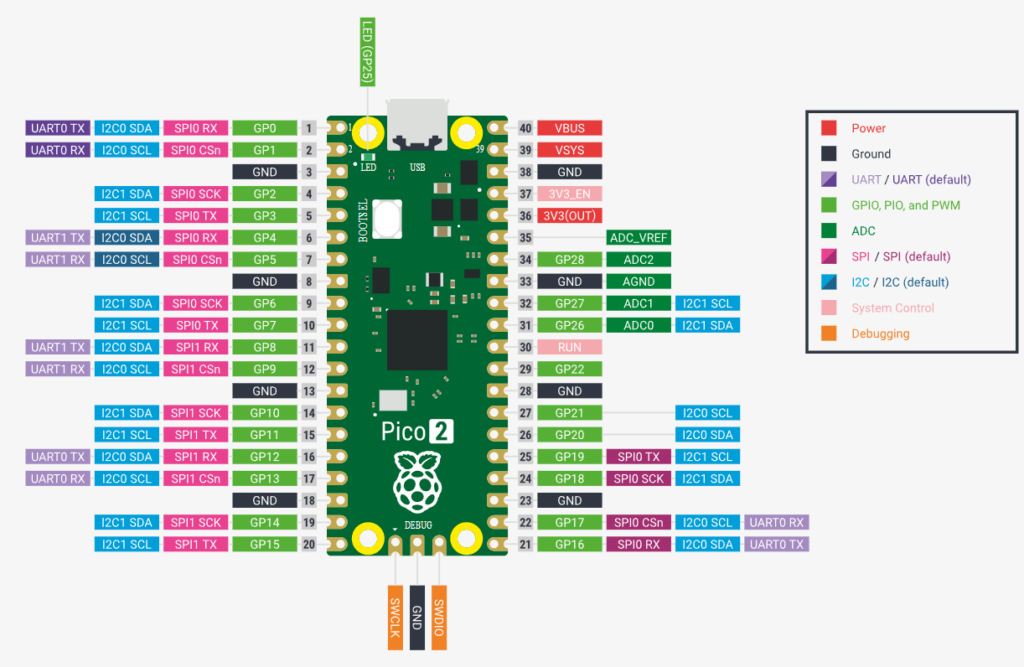
The board is selling for 5$ in international market and for ~500₹ in indian market. You can find the approved resellers on raspberry site. Pico 2 will remain in production until 2040.
Programming Pico 2 with Arduino IDE
Get latest version of Arduino IDE from here. Now we need to install support for Pico board. Arduino support for pico board is developed by Earle F. Philhower and community based on official raspberry pi SDK. This arduino core has support for many boards that are based on RP2040 and RP2350 microcontrollers (Pico, Pico W, Pico 2, Pico 2W).
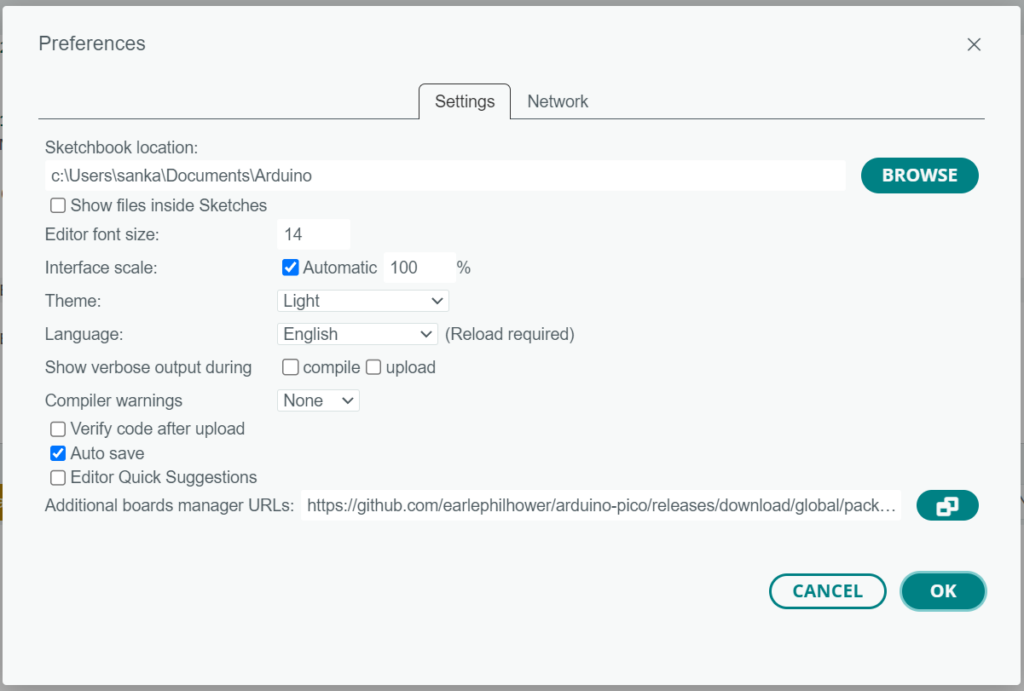
To install arduino-pico core, First we need add additional board manager URLs. Open File -> Preferences, in Additional board manager URLs, add the following link and click on OK.
https://github.com/earlephilhower/arduino-pico/releases/download/global/package_rp2040_index.json
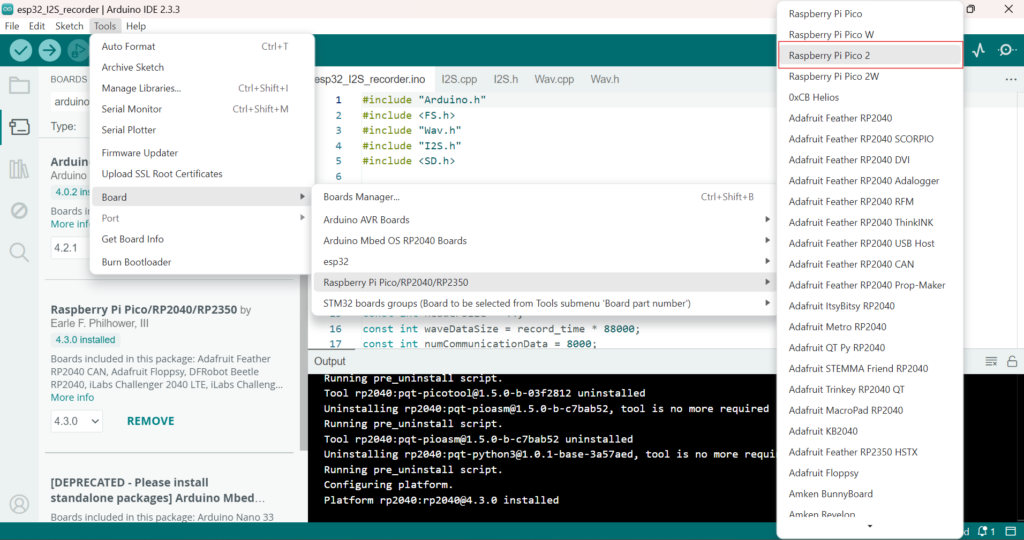
Now click on board manager and search for “arduino-pico”. Install or update “Raspberry Pi Pico/RP2040 by Earle F. Philhower, III” . The installation will take couple of minutes. Pico 2 will be available in the board selection dropdown after the installation is completed.

Select Pico 2 from the board selection dropdown.
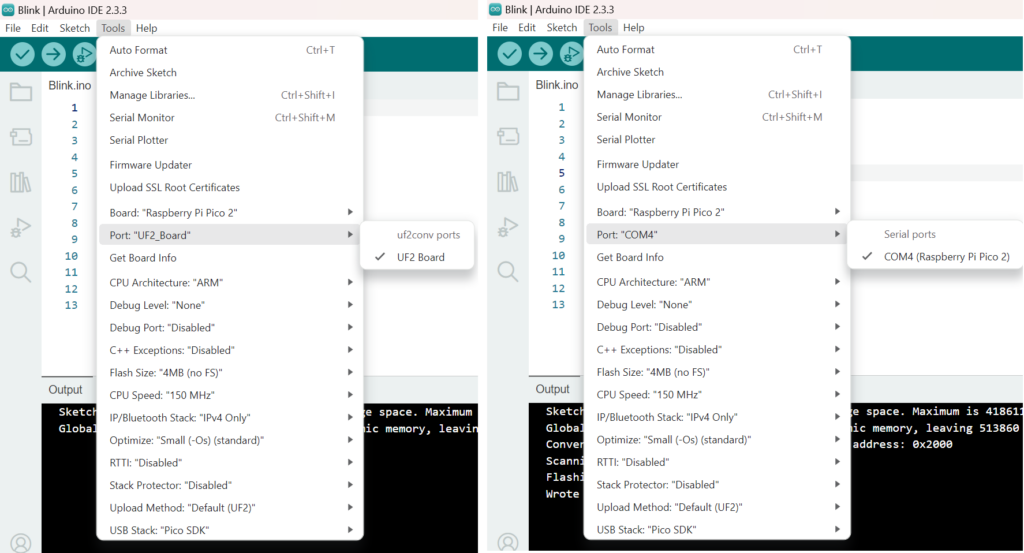
To upload the sketch we need to select the port, goto tools -> port. If this is the first time you are programming pico 2, the board will appear as UF2 Board, otherwise it will be listed as regular COM port. Pico can be forced to connect as UF2 board by holding down the BOOTSEL button and then connecting it the host computer.
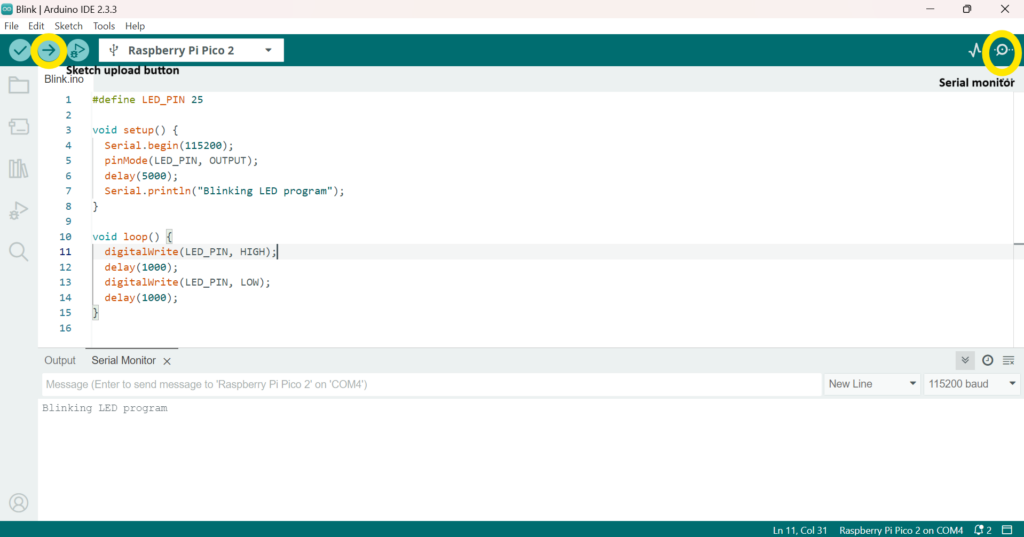
Pico 2 has onboard led and its connected to GPIO25, upload the following sketch to see the LED blinking.
#define LED_PIN 25

void setup() {
  Serial.begin(115200);
  pinMode(LED_PIN, OUTPUT);
  delay(5000);
  Serial.println("Blinking LED program");
}

void loop() {
  digitalWrite(LED_PIN, HIGH);
  delay(1000);
  digitalWrite(LED_PIN, LOW);
  delay(1000);
}
The sketch will also print the message on the serial monitor.
In this post we have seen how to setup and program Raspberry pi pico 2 using Arduino IDE.


Thank you very much. I needed just that.