Programming Wio Terminal from Arduino IDE
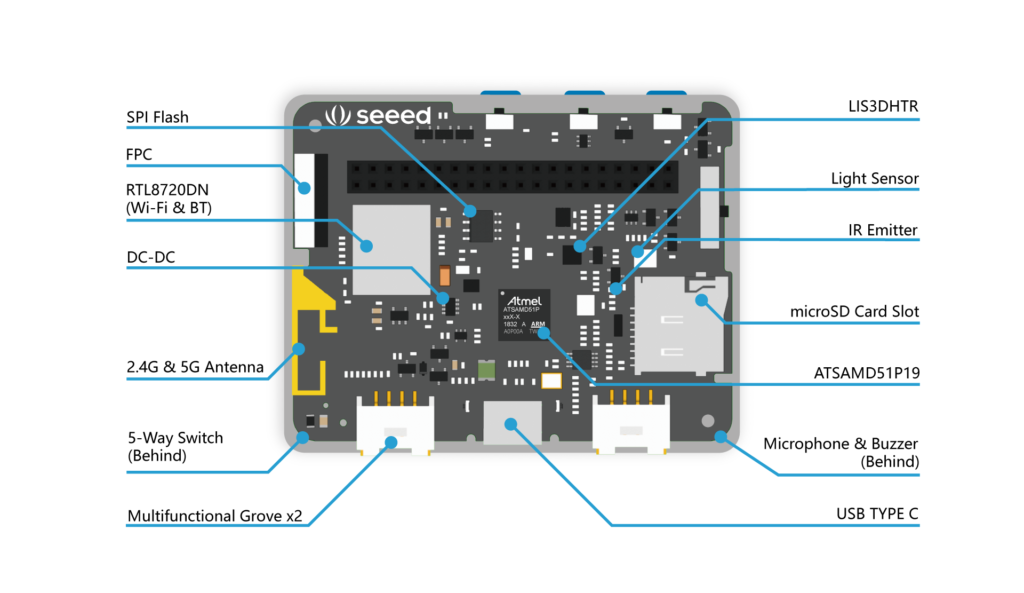
Wio terminal is ATSAMD51 based all in one smart development platform for embedded developers. It provides both WiFi and BLE 5.0 functionalities through on board RTL8720DN chip. In this post we will see how to setup Arduino IDE to work with Wio terminal and flash “hello world” sketch.

Features of Wio Terminal
- Controller : ATSAMD51P19 – 120MHz, 4MB External flash, 192KB SRAM
- Wireless : RTL8720DN – 2.4Ghz/5Ghz WiFi, BLE 5.0
- USB : Can act as both USB host and USB Client
- On Board peripherals : LCD Screen (320×240), Accelerometer (LIS3DHTR), Microphone, Speaker, Light sensor, IR emitter
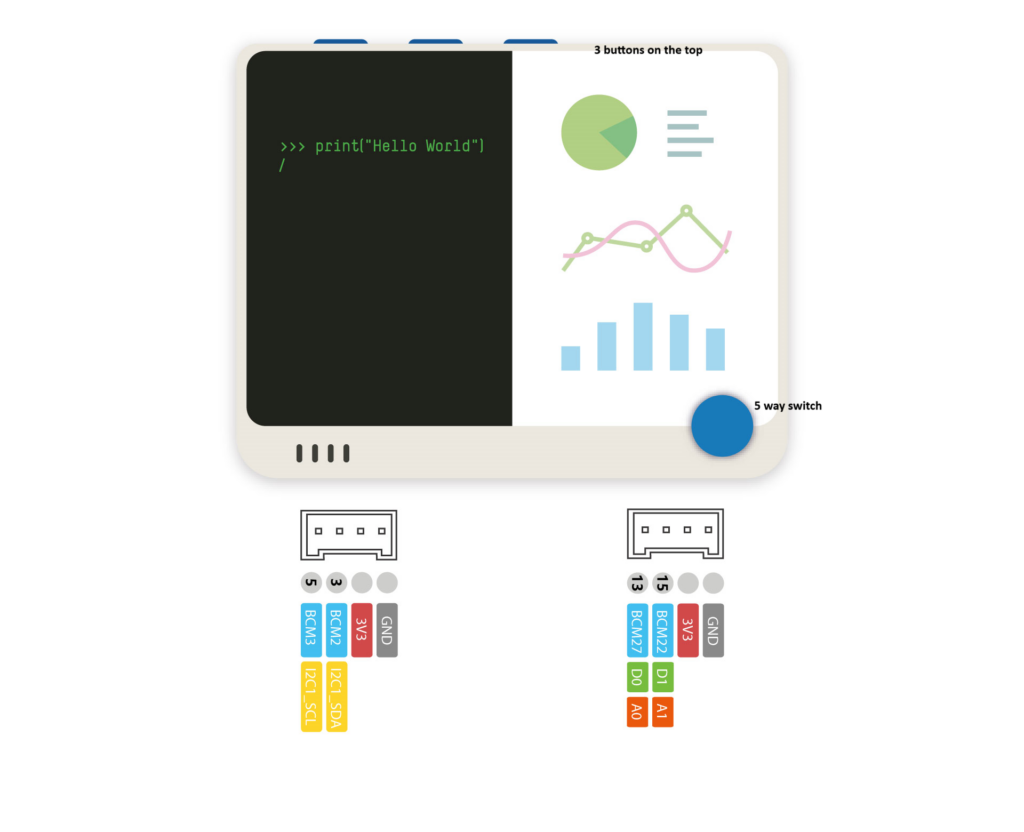
- Connectors : 40 Pin Pi compatible pin header and two groove headers.
- Development platform : Arduino, CircuitPython, ArduPy
Programming Wio Terminal with Arduino IDE
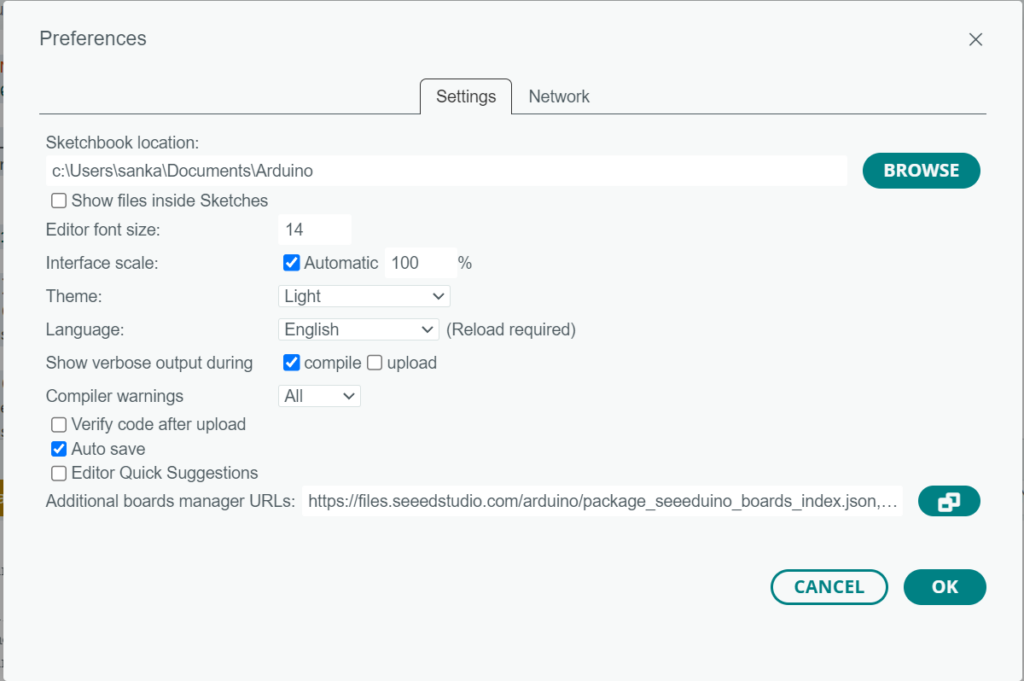
Download and install latest version of Arduino IDE from here. Then we need to add seedstudio board manager URL in the additional boards manager URLs. Open Files -> Preferences and add the following link in “Additional board manager URLs”
https://files.seeedstudio.com/arduino/package_seeeduino_boards_index.json
Now click on board manager menu item and search for “wio terminal”, you should see Seed SAMD Boards by Seed Studio. Click on Install/update, the board support will be added in couple of minutes.
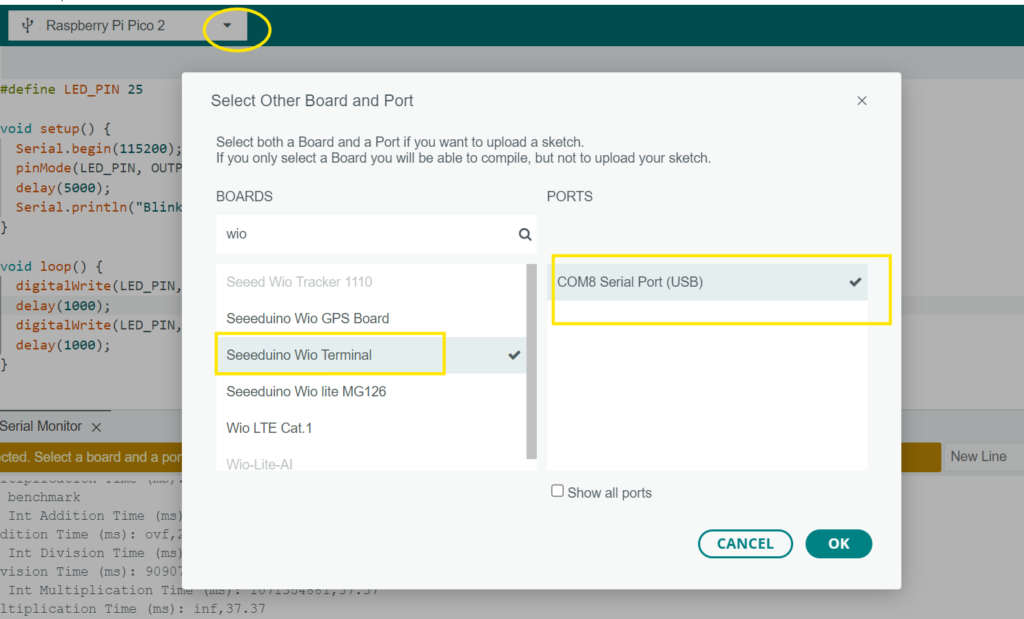
Connect Wio terminal to host computer and select the board from Tools -> Board section, and port from Tools -> Port section. We can also select both board and port from the quick action menu bar.
Create a new sketch and copy paste the following code, then click on upload button. Once upload is completed, you will see “Hello World” text on the Wio display and in serial monitor.
Wio terminal has WiFi support, so we can make HTTP requests. Check out this post to see how to connect Wio to WiFi network and make HTTP requests.


