HTTP Get request with WIO terminal
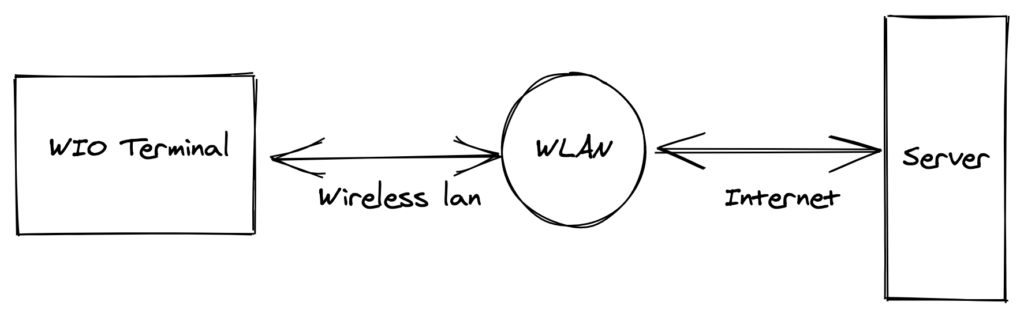
WIO terminal comes with Realtek RTL8720DN which supports both WiFi and BLE 5.0. We can use the WiFi support to connect the WIO terminal to a WLAN and make a HTTP request. In this post we will see how to make a GET request from WIO terminal.
What will we learn
- how to setup WIO terminal development environment in Arduino IDE
- how to connect WIO terminal to WiFi network (WLAN)
- how to make a HTTP GET request using WIO terminal
what do we need
- WIO Terminal hardware
- Arduino IDE
Adding WIO terminal support to Arduino IDE
Go to File -> preference and place the following link in “additional boards” text box
https://files.seeedstudio.com/arduino/package_seeeduino_boards_index.json
Then go to Tools -> Board -> Boards manger and search for WIO terminal. You will “Seed SAMD Boards” in the search results, install it (select latest version).
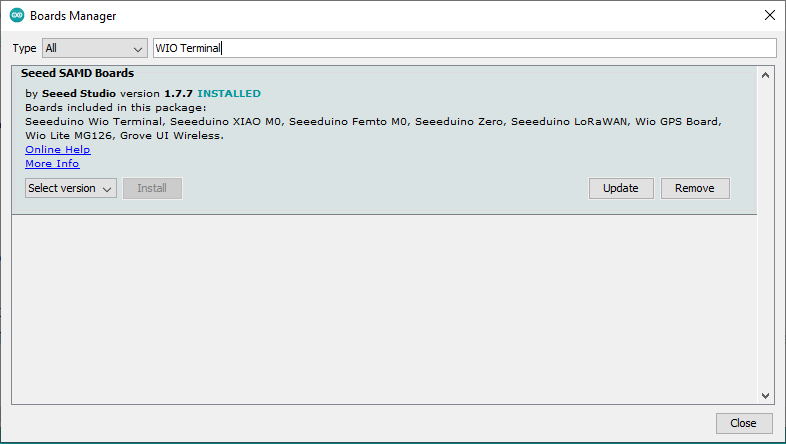
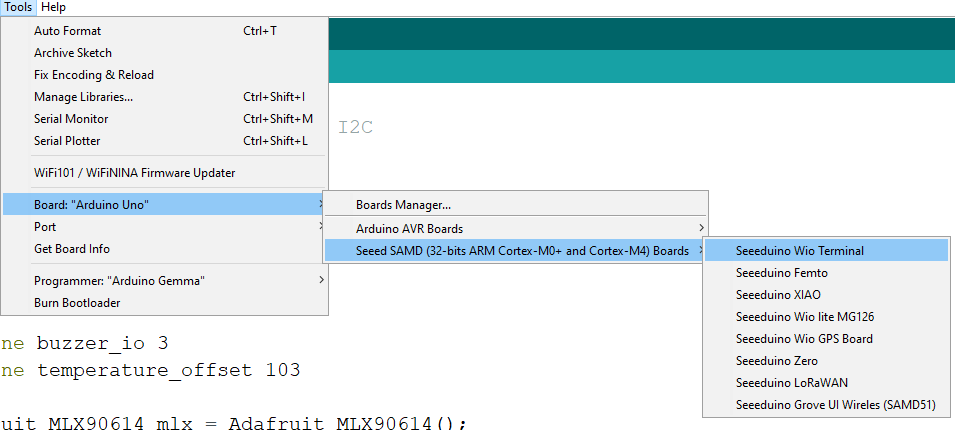
Once installed, there will be new section in boards selector, select WIO terminal
We also need to get few libraries that are not part of the WIO core. Download the following libraries and add them to Arduino IDE. You can add a library to Arduino IDE by going to Sketch -> Include Library -> Add .ZIP library. You need to choose one zip file at a time.
https://github.com/Seeed-Studio/Seeed_Arduino_rpcWiFi/releases
https://github.com/Seeed-Studio/Seeed_Arduino_rpcUnified/releases
https://github.com/Seeed-Studio/Seeed_Arduino_mbedtls/archive/dev.zip
https://github.com/Seeed-Studio/Seeed_Arduino_FS/releases
https://github.com/Seeed-Studio/Seeed_Arduino_SFUD/releases
Updating RTL8720 firmware
before we can use the WiFi libraries we need update the WiFi chip firmware to the latest version.
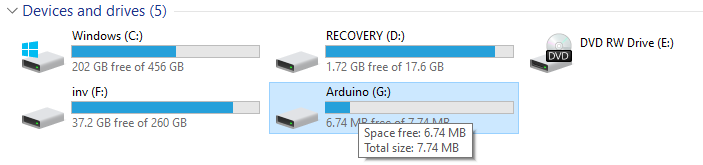
Put the WIO in bootloader mode (slide the power switch of wio twice to put the board into boot-loader mode), and place this bridge program in the “Arduino” drive that is available now. Once the bridge program is placed in the “Arduino” drive, WIO terminal will show “Burn RT8720 fw” message on its display.
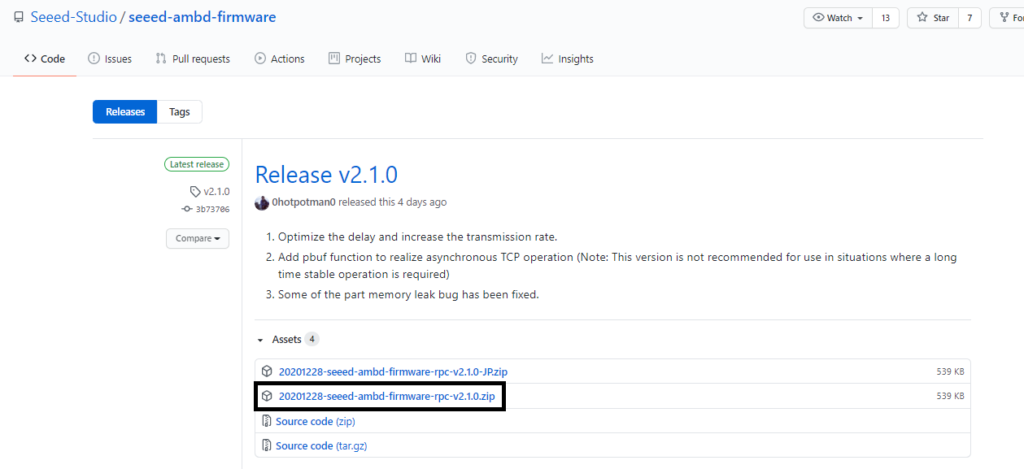
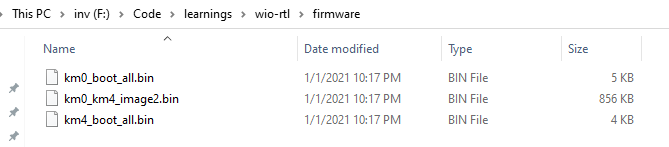
Download the latest firmware and flashing tool. The firmware folder contains three files, copy the path of the folder that contains the three bin files.
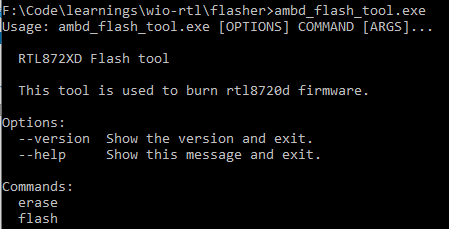
If we run the flashing tool “ambd_flash_tool.exe” with out any arguments, it will print the usage instructions as follows.
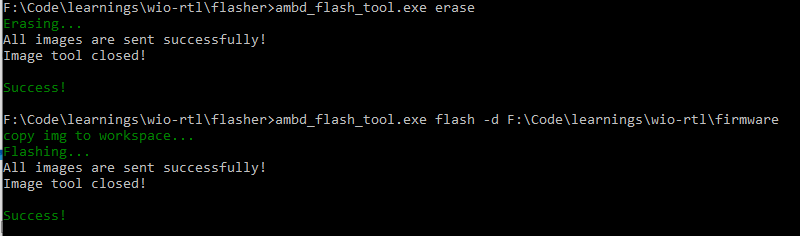
First we need to erase old firmware and then load the new one. Run the following two commands to erase and load the new firmware.
ambd_flash_tool.exe erase
ambd_flash_tool.exe flash -d <path-to-firmware>
Connecting WIO to WiFi network
You need to get SSID and passphrase of your WiFi network and put them in below script. Once the WIO is connected to WiFi network it will print the IP address on display.
We need to provide SSID and password to the begin method and use status method to verify connection status. I also added the logic to print a dot on LCD every time we make call to begin method. The loop breaks once WIO is connected to WiFi and prints the IP address on LCD. We can get the IP address using localIP method.
#include "TFT_eSPI.h"
#include "rpcWiFi.h"
const char *ssid = "SSID";
const char *password = "PASSWORD";
TFT_eSPI tft;
void setupLCD(){
   tft.begin();
   digitalWrite(LCD_BACKLIGHT, HIGH); // turn on the backlight
   tft.setRotation(3);
   tft.fillScreen(TFT_BLACK); //Black background
   tft.setFreeFont(&FreeSansOblique12pt7b); //select Free, Sans, Oblique, 12pt.
 }
 void setup()
 {
     Serial.begin(115200);
     delay(10);
     Serial.println();
     Serial.print("Connecting to ");
     Serial.println(ssid);
     setupLCD();
     int dotCounter = 0;
     while (WiFi.status() != WL_CONNECTED)
     {
         if(dotCounter%10 == 0){
          tft.fillScreen(TFT_BLACK);
          tft.setCursor(100,110);
         }
         tft.print(".");
         dotCounter ++;
         WiFi.begin(ssid, password);
     }
     tft.fillScreen(TFT_BLACK);
     tft.setCursor(100,110);
     tft.print("IP:");
     tft.print(WiFi.localIP());
     Serial.println("");
     Serial.println("WiFi connected");
     Serial.println("IP address: ");
     Serial.println(WiFi.localIP());
}
void loop(){}
Making a HTTP GET Request with WIO
We are using HTTPClient library to make a GET request. The following script will connect to the provided WiFi network and prints the ascii art available here.
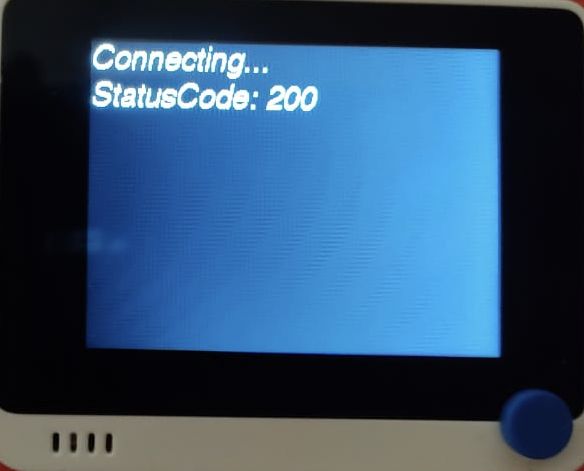
The script will check if the WIO is connected to a network before making the request. If the network is available it will make the GET request and print the status code on LCD. The ascii art will be printed on serial console.
 #include "TFT_eSPI.h"
 #include "rpcWiFi.h"
 #include "HTTPClient.h"
 const char *ssid = "SSID";
 const char *password = " PASSWORD";
 TFT_eSPI tft;
 void setupLCD(){
   tft.begin();
   digitalWrite(LCD_BACKLIGHT, HIGH); // turn on the backlight
   tft.setRotation(3);
   tft.fillScreen(TFT_BLACK); //Black background
   tft.setFreeFont(&FreeSansOblique12pt7b); //select Free, Sans, Oblique, 12pt.
 }
 void checkWiFi(){
     if(WiFi.status() == WL_CONNECTED){
       return;
     }
     int dotCounter = 0;
     while (WiFi.status() != WL_CONNECTED)
     {
         if(dotCounter%10 == 0){
          tft.fillScreen(TFT_BLACK);
          tft.setCursor(100,110);
         }
         tft.print(".");
         dotCounter ++;
         WiFi.begin(ssid, password);
     }
     Serial.println("");
     Serial.println("WiFi connected");
     Serial.println("IP address: ");
     Serial.println(WiFi.localIP());
 }
 void setup()
 {
     Serial.begin(115200);
     delay(10);
     Serial.println();
     Serial.print("Connecting to ");
     Serial.println(ssid);
     setupLCD();
 }
 void loop(){
   checkWiFi();
   tft.fillScreen(TFT_BLACK); //Black background
   tft.setCursor(0,20);
   tft.println("Connecting…");
   HTTPClient client;
   client.begin("http://www.arduino.cc/asciilogo.txt"); // Make HTTP GET request
   int httpCode = client.GET();
   tft.print("StatusCode: ");
   tft.println(httpCode);
   if(httpCode!=0){
     Serial.print(client.getString());
   }
   client.end();
   delay(10000);
 }


