Installing Podman on Windows
Podman offers an alternative to docker for managing containers and images. Podman desktop can be used in places of Docker desktop. On windows, podman works by creating a machine (guest VM) backed by WSLv2 (windows subsystem for Linux) or it can also use the Windows Hyper-V. In this post we will see how to install Podman on a windows machine.
Installing Podman
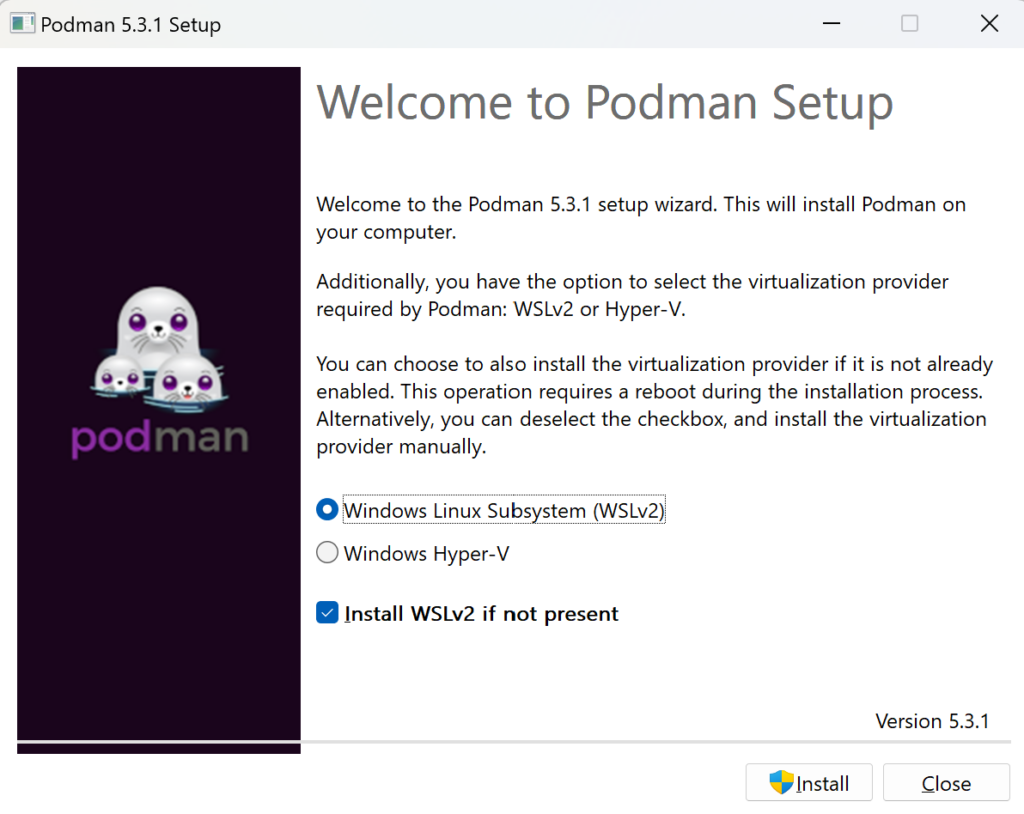
download latest version executable (.exe) from github release page, at the time of this writing 5.3.1 is the latest release. So will be installing 5.3.1 in this guide. Run the installer after downloading, podman command will be available on the PATH once the installation is complete. During the installation podman offers selection of virtualization provider, select WSLv2. If you don’t have WSLv2 already installed podman can install it for you just select the checkbox.
Launch a new Terminal window and try the following command. If the command prints the version, then podman is installed successfully.
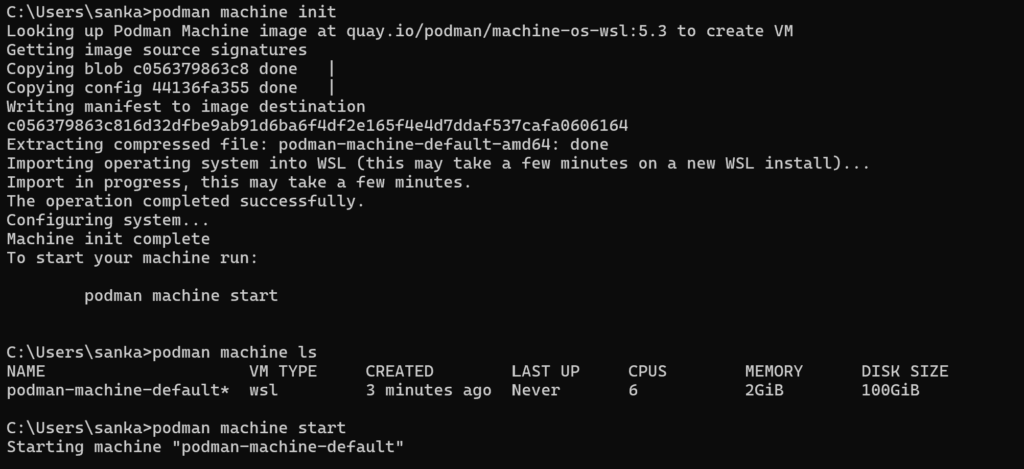
Now we need to create a machine, following are some use full commands to work with the pods man machine.
podman machine init
podman machine start
podman machine ls
podman machine stop
To delete the machine run the following command
podman machine rm
podman allows directly SSHing into the machine using ssh command.
podman machine ssh
Installing Podman Desktop
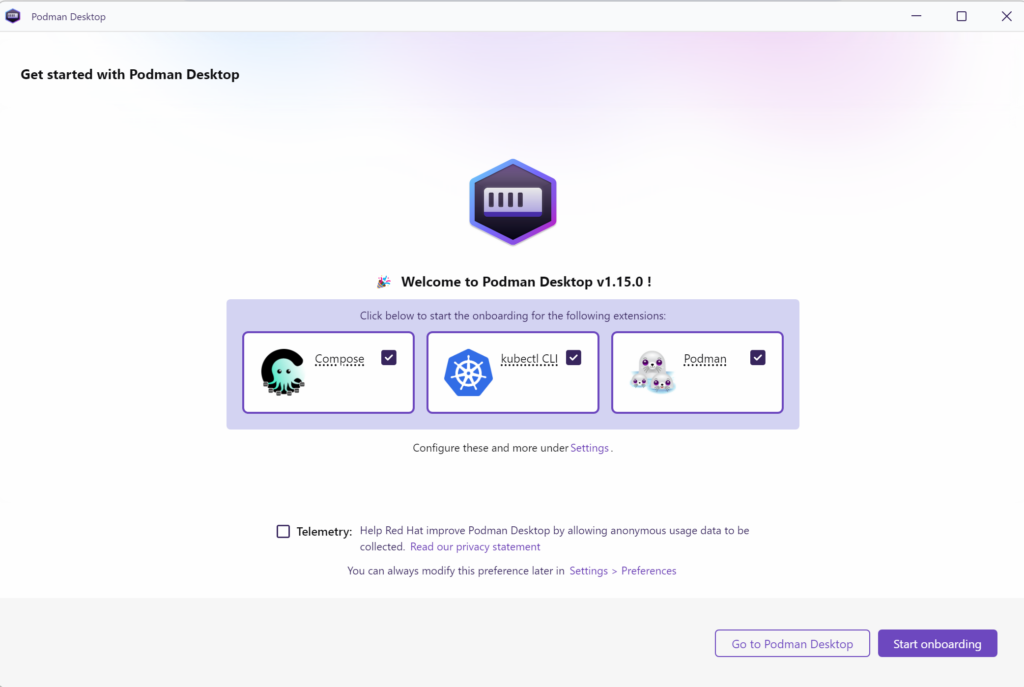
Podman desktop offers provides a simple and UI based way to work with containers and Kubernetes. Grab latest version from github release page. I am installing 1.15.0 for this guide. Click on the executable and you will be shown a window to select extensions, select and click on “Start onboarding” button.
Complete the onboarding and you will be taken Podman desktop dashboard page. This will setup compose, so you can use podman compose to manage different containerised services.
Writing a simple compose file for Redis and MySQL
Nearly every web application requires a database and a caching service. Let’s define a compose file that will create redis and mysql services. Generally these compose files are stored along with the project files in same git repo. We will also use named volumes for storing data for both redis and mysql. To create the directories, ssh into the machine and run the following commands.
mkdir -p ~/cnt/mysql-data && chmod -R 777 ~/cnt/mysql-data
mkdir -p ~/cnt/redis-data && chmod -R 777 ~/cnt/redis-data
The following compose file defines the required services, it also defines named volumes for the directories created above
services:
  mysql:
    image: mysql:8.4.3
    container_name: mysql_db_8_4
    environment:
      MYSQL_ROOT_PASSWORD: root # this is not production ready config
      MYSQL_DATABASE: icdev
      MYSQL_USER: user01
      MYSQL_PASSWORD: password
    ports:
      - "3306:3306" # mysql port
    volumes:
      - mysql_data:/var/lib/mysql
  redis:
    image: redis/redis-stack:7.2.0-v13
    container_name: redis_cache
    ports:
      - "6379:6379"  # redis port
      - "8001:8001" # redis insight port
    environment:
      REDIS_ARGS: "--requirepass mypass" # not production ready
    volumes:
      - redis_data:/data
volumes:
  mysql_data:
    driver: local
    driver_opts:
      type: none
      device: /home/user/cnt/mysql-data # directory should be present already, if not create it mkdir -p ~/cnt/mysql-data && chmod -R 777 ~/cnt/mysql-data
      o: bind
  redis_data:
    driver: local
    driver_opts:
      type: none
      device: /home/user/cnt/redis-data # directory should be present already, if not create it mkdir -p ~/cnt/redis-data && chmod -R 777 ~/cnt/redis-data
      o: bind
Navigate to the compose file directory and run the following command. It will start all the services present in the compose file
podman compose up -d
podman compose stop
We can also start or stop a specific service using the service name
podman compose up -d redis
podman compose stop redis


