How to develop a wireless token display system using ESP32 ?
ESP32 is an inexpensive IoT chip. ESP32 makes it easy to add internet capability to embedded systems. We have seen how to develop a token display using Arduino UNO this post. Because Arduino UNO doesn’t have any wireless capability, we used to serial connection for communication between UNO and client (PC). If we use ESP32 instead of Arduino UNO, we can update the token number without wired connections.
Objective
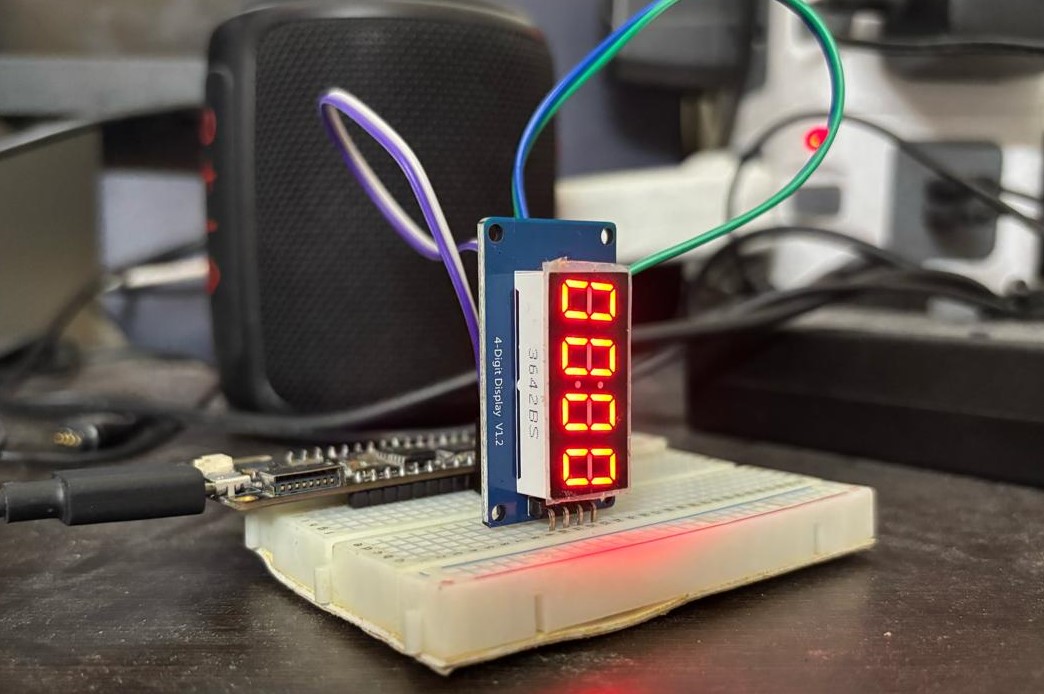
We would like to develop a wireless token display system. Users should be able to update the token number from laptop or mobile phone.
What you need
- ESP32 development board
- TM1637 based 7 segment display
- Jumpers for connecting ESP32 with TM1637
Approach
We will use ESP32 for WiFi capabilities and TM1637 for controlling the 7 segment displays. ESP32 will act as web server and servers a web page using which users can update the token number shown on the display. ESP32 web server is not exposed to internet, it will only be accessible to the clients in the same network (User device such laptop or mobile phone should be connected to the same router/network as that of the ESP32).
To understand TM1637 interface protocol, check out the following posts.
- Interfacing TM1637 with microcontrollers
- Interfacing TM1637 with Arduino uno – same code will work with ESP32 as well
Connections
| ESP32 | Display board |
| 3V3 | VCC |
| GND | GND |
| 22 | CLK |
| 19 | DIO |
Code
ESP32 web server will provide two URLs. One for loading the web page (root url) and another one for updating the token number shown on the display (/update-token).
The code can be classified into two parts, html part and arduino part. HTML script is embedded into arduino code using raw string literal.
The HTML script has a textbox to accept the token number and a button for triggering the POST call to ESP32 web server asynchronously using fetch api. As part of the POST request we send form-data that has single key-value pair.
async function sendTokenNumber(tokenNumber) {
  console.log("sending token number "+tokenNumber);
  let formData = new FormData()
  formData.append('token-number',tokenNumber)
  let res = await fetch('/update-token',{
    method: 'post',
    body: formData
  })
  console.log(`resposnse ${res.status}`);
}
When a get request comes for the root url “/”, this entire htmlPage string will be returned as response.
void handleIndex() {
  server.send(200,"text/html",htmlPage);
}
A post endpoint is provided for accepting the token number at “/update-token”. In this handler we get the form field key “token-number” and convert it to integer. Then call the displayTokenNumber to update the token number on display.
void handleUpdate() {
String tokenNumberStr = server.arg("token-number");
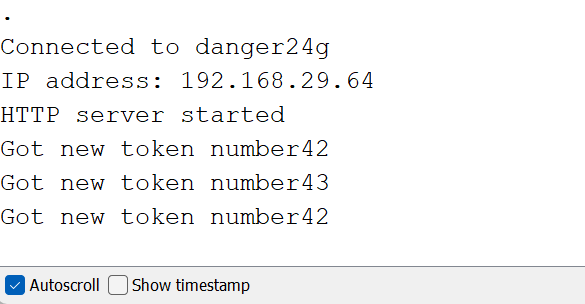
Serial.print("Got new token number");
Serial.println(tokenNumberStr);
int tokenNumber = strtol(tokenNumberStr.c_str(), NULL, 10);
displayTokenNumber(tokenNumber);
server.send(200, "text/plain", tokenNumberStr);
}
How to update the token number
Upload the above program to ESP32 and open serial terminal (update the SSID and password before uploading). once ESP32 is connected to access point it will print the IP address in the serial console.
Open browser tab and enter the IP address, the following page should load. The web page allows user to set,increase or decrease the token number.


