Token Display System using TM1637 and Arduino UNO
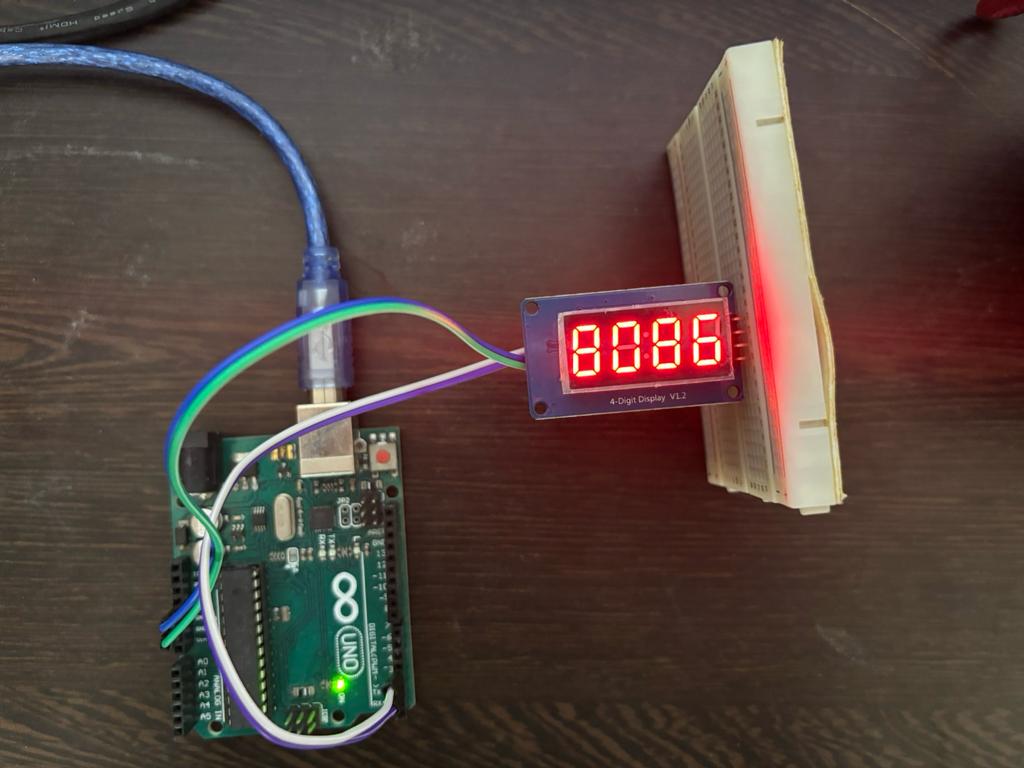
You might have seen some kind of large token display systems in hospitals and other waiting areas. In this post we will develop a token display system using TM1637 LED driver and Arduino uno.
We need to provide a interface for user to change the the token number displayed. We will provide two kinds of interfaces. One with keypad and another with browser (web app).
The interface uses a keypad with two buttons, that lets the user to increment or decrement the token number by one. The second interface will be through PC. We can program Arduino UNO to accept commands from serial line and update the token number based on the received command.
What you need
- Arduino UNO
- TM1637 based 4 digit 7-segment display
- PC to program UNO and some jumpers to connect uno with display
Connections
The TM1637 driver can also read a keypad, but for this post will connect two buttons directly to uno. We will use UNO’s internal pull ups, so no external pull up resistors are required for the buttons.
| Arduino UNO | Display board |
| 5V | VCC |
| GND | GND |
| 3 | CLK |
| 2 | DIO |
we also need to connect two button.
| Arduino UNO | Buttons |
| 4 | increment |
| 5 | decrement |
Code
Upload the following code to arduino uno.
#include <Arduino.h>
const uint8_t CLK_CYCLE_DELAY = 100;// us
const uint8_t CLK_PIN = 3;
const uint8_t DIO_PIN = 2;
const uint8_t NUM_DIGITS = 4;
const uint8_t INCR_BTN = 4;
const uint8_t DECR_BTN = 5;
uint8_t buffer[NUM_DIGITS+1] = {0xC0}; // first byte will be the register address
// LED segment patterns.
const uint8_t NUM_PATTERNS = 10;
int tokenNumber = 0;
const uint8_t PATTERNS[NUM_PATTERNS] = {
0x3F, // 0
0x06, // 1
0x5B, // 2
0x4F, // 3
0x66, // 4
0x6D, // 5
0x7D, // 6
0x07, // 7
0x7F, // 8
0x6F, // 9
};
void setDataPin(uint8_t _bit){
digitalWrite(DIO_PIN,_bit);
}
void setClkPint(uint8_t _bit){
digitalWrite(CLK_PIN,_bit);
}
void sleep(int sleep){
delayMicroseconds(sleep);
}
void start() {
setDataPin(0);
sleep(CLK_CYCLE_DELAY);
setClkPint(0);
sleep(CLK_CYCLE_DELAY);
}
void stop() {
setDataPin(0);
sleep(CLK_CYCLE_DELAY);
setClkPint(1);
sleep(CLK_CYCLE_DELAY);
setDataPin(1);
}
void writeByte(uint8_t _byte){
for(uint8_t i=0;i<8;i++){
setDataPin(_byte >> i & 0x01) ;
sleep(CLK_CYCLE_DELAY);
setClkPint(1);
sleep(CLK_CYCLE_DELAY);
setClkPint(0);
sleep(CLK_CYCLE_DELAY);
}
setClkPint(0);
sleep(CLK_CYCLE_DELAY);
setClkPint(1);
sleep(CLK_CYCLE_DELAY);
setClkPint(0);
sleep(CLK_CYCLE_DELAY);
}
void writeDataCmd(uint8_t cmd){
start();
writeByte(cmd);
stop();
}
void sendByteStream(uint8_t *bytes,uint8_t len) {
writeDataCmd(0x40);
start();
for(uint8_t i=0;i<len;i++){
writeByte(bytes[i]);
}
stop();
}
void displayTokenNumber(int tokenNumber){
for(uint8_t i=0;i<NUM_DIGITS;i++){
uint8_t digit = tokenNumber % 10;
tokenNumber = tokenNumber/10;
buffer[NUM_DIGITS - i] = PATTERNS[digit];
}
sendByteStream(buffer,NUM_DIGITS+1);
}
bool readButton(uint8_t btnPin){
if(digitalRead(btnPin) == HIGH){
return false;
}
uint8_t sampleCount = 0;
while(sampleCount < 3 ){
if(digitalRead(btnPin) == HIGH){
sampleCount++;
}else{
sampleCount = 0;
}
delay(20);
}
return true;
}
void setup() {
Serial.begin(115200);
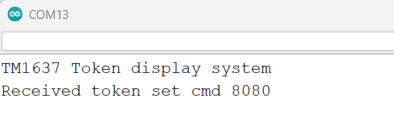
Serial.println("TM1637 Token display system");
pinMode(CLK_PIN,OUTPUT);
pinMode(DIO_PIN,OUTPUT);
pinMode(INCR_BTN,INPUT_PULLUP);
pinMode(DECR_BTN,INPUT_PULLUP);
stop();
// switch on the display
uint8_t displayControlCmd[1]={0x8F};// display on with full brightness
sendByteStream(displayControlCmd,1);
}
void loop() {
if (Serial.available()) {
String inputString = Serial.readStringUntil('\n');
if(inputString.startsWith(":")){
String tokenNumberStr = inputString.substring(1); // extract the angle
tokenNumber = strtol(tokenNumberStr.c_str(), NULL, 10); // convert str to int
Serial.print("Received token set cmd ");
Serial.println(tokenNumber);
}
}
if(readButton(INCR_BTN)){
tokenNumber++;
}
if(readButton(DECR_BTN)){
tokenNumber--;
}
displayTokenNumber(tokenNumber);
}Testing serial interface
open serial console and send the following command, the display will show the sent number. The command format is simple, just prefix the number with colon.
:8080
Testing web interface
We can also send serial commands from browser using webserial api. We can develop a simple webpage using webserial api that provides an interface for updating the token number. Please note that the arduino serial console should be closed when using the web app.
The web page is simple, it will have a textbox to accept a number and a button to update the token number. We will also provide a button for incrementing and another one for decrementing the token number. The web page code is available here.


