Set up raspberry pi without monitor and keyboard
In the past, setting up raspberry pi would require a keyboard and monitor. There were ways to do it without keyboard in the past also, but it was not straightforward. Now it become very simple with the raspberry pi imager. In this post we will see how to setup raspberry pi using Raspberry pi imager without monitor and keyboard.
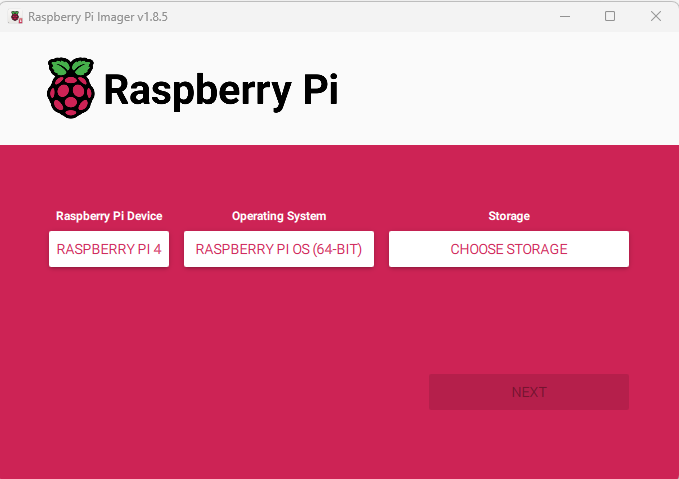
Download the raspberry pi imager and run the installer. After the installation is completed, run the program and it will open up a windows like the following. It will allow us to select the pi version and OS we would like to install. Connect the SD card also to the PC and select the drive using the “CHOOSE STORAGE” option.
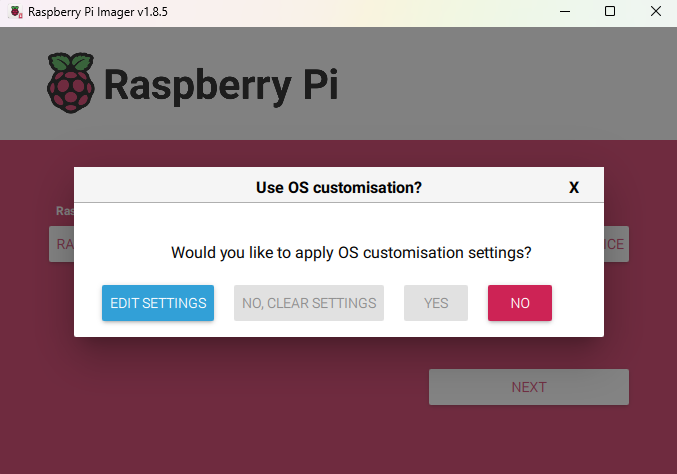
Once all options are selected, click on select you will be presented with a popup window to edit the settings. Click on “EDIT SETTINGS” button.
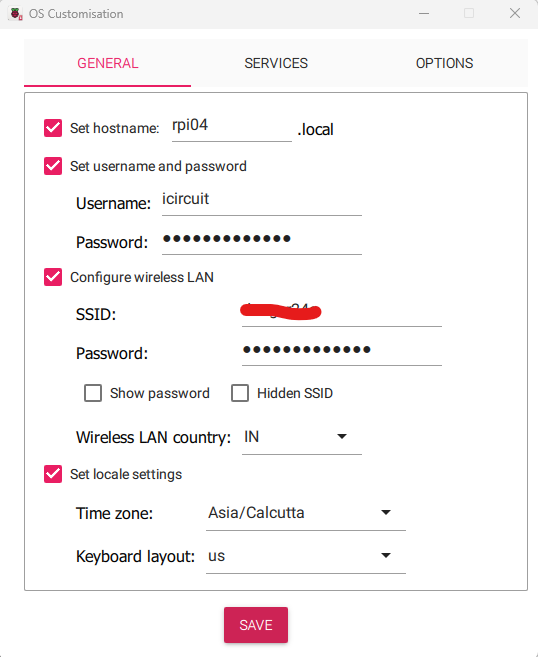
In the customisation window, we need to set username and password. We also need to provide WiFi access point details. Setting hostname would allow us to login to the pi with hostname (no need to search for the IP of the pi).
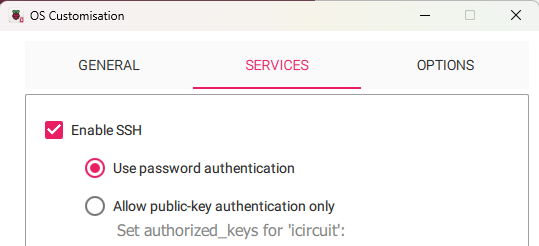
Click on “SERVICES” tab and Select “Enable SSH” check box. You can choose between password authentication or key based authentication. I will be going with password based authentication.
Now you can click and save and start the writing process. It will take few minutes for the flash process to complete. You can take out the SD card from PC and insert into Pi after imager completes the writing process.
Getting IP address of the Pi
Power up the Pi, We can get the Pi’s IP using nslookup command (wait for few seconds, if the command fails, connecting to WiFi will take sometime).

If you have trouble finding the IP using nslookup, you can also check the connected devices from access point web interfaces (generally WiFi access points will have web interface that will allow us to see the connected devices and their IP address)
Connecting to Pi from putty
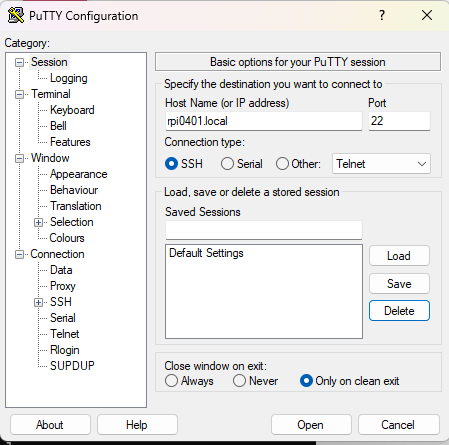
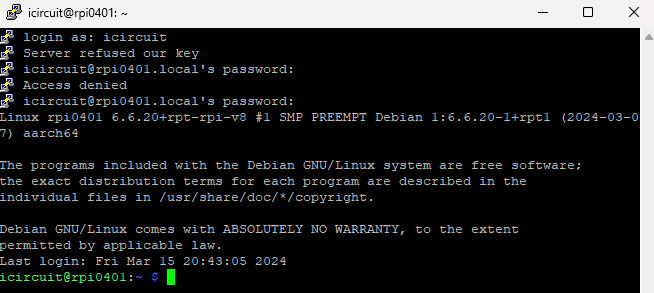
We can also SSH into the Pi using the hostname. I am using putty as SSH client, provide the hostname and click on “Open”, you will be asked for the username and password.
Connecting fan
Fan provides active cooling to the CPU. This will avoid CPU throttling issues on Pi. For small fans, we can take power from the Pi GPIO interface itself.
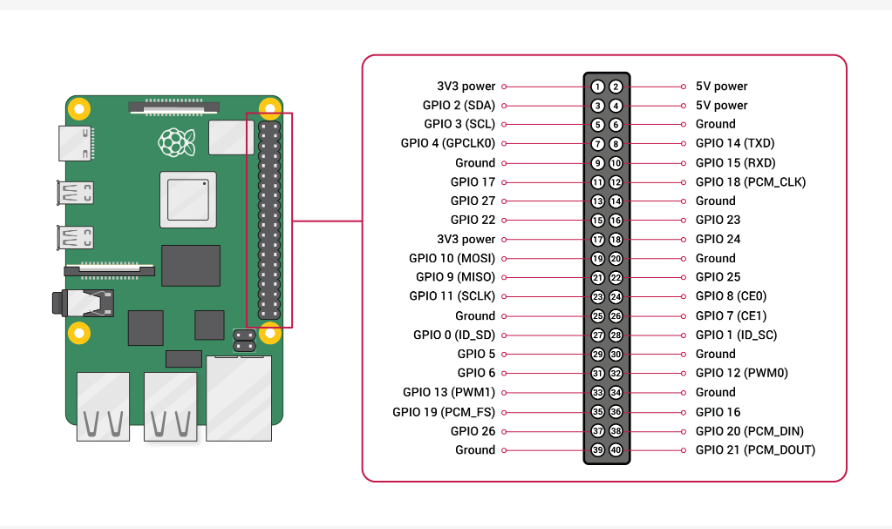
Connect fan +ve terminal to 5v (pin 4) and -ve terminal to Ground (pin 6). With increasing power usage, active cooling is necessary to avoid CPU throttling. In my testings, temperature is easily crossing 50’C without fan.
There are couple of ways to see the temperature of the SoC. The output of the first command temperature need to divided by 1000 to get the temperature in centigrade.
cat /sys/class/thermal/thermal_zone0/temp
vcgencmd measure_temp