Arduino: Controlling Servo With ESP32
ESP32 supports many development platforms such ESP-IDF, MicroPython and Arduino. I had already shown how to interface servo with esp32 using ESP-IDF and MicroPython. In this post we will see how to control the servo using ESP32 on arduino platform.

What you need
- Arduino IDE with ESP32 framework installed
- ESP32 Servo library for arduino
- ESP32 Dev board (any board the exposes the GPIOs should work)
- Servo motor and jumper wires
Installing Arduino ESP32 servo library
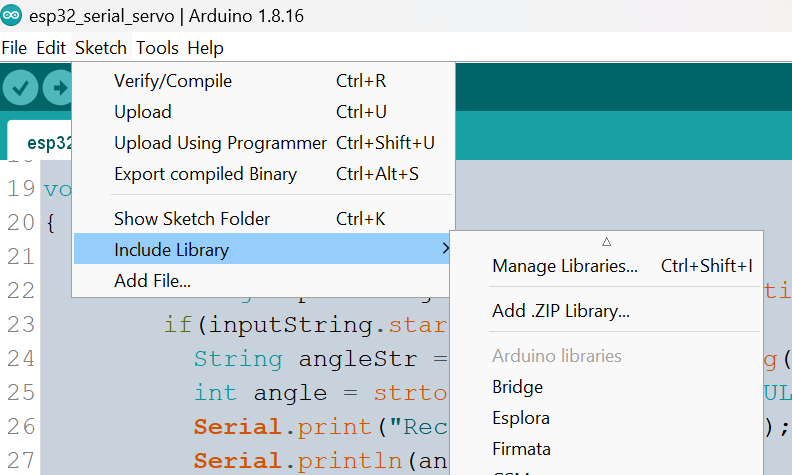
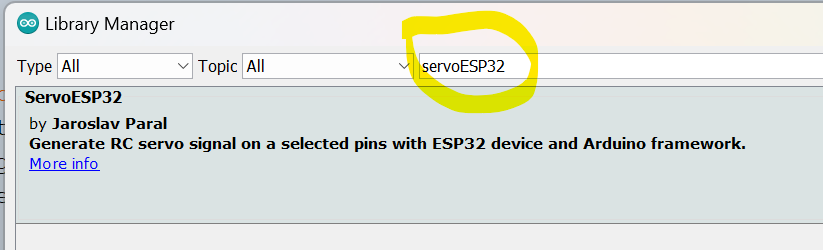
open library manager and search for ServoESP32. you can see the following screenshots for reference.
Connecting Servo to ESP32
I am using IO12, but most of the other IOs should also work. I am using 9g servo, power supply from dev board should be enough for this. For large servos, you might want to use a dedicated power supply
connect signal wire (generally the orange wire carries signal on servos) to IO12, brown to GND and red to +5V.
- orange – IO12
- red – +5v
- brown – GND
Sweep Servo
Since arduino tries to abstract controller details, the program is very similar to servo control programs of other controllers.
We create instance of servo and attach it to the IO12. Then we continuously change the angle from 0 to 180 and 180 to 0 using two for loops. Under the hood, we are simply generating a PWM signal using LEDC peripheral of the ESP32. To change the angle we change the duty cycle of the PWM signal. You can read more about the LEDC here.
Controlling servo angle using serial commands
To make things interesting, we will read the target angle from serial data and set the servo to requested angle. The servo control part remain same from the above program. Additionally, we need to parse the serial data. The command structure is simple. The command is a newline terminated, colon prefixed angle.
:{angle}\n
Arduino code will continuously monitor the serial stream, if there is data available, then we read until newline character. we verify if this is a set command by matching the first character. If the first character is colon, then we parse the remaining string as integer and use setServoAngle method to move the servo into desired position.
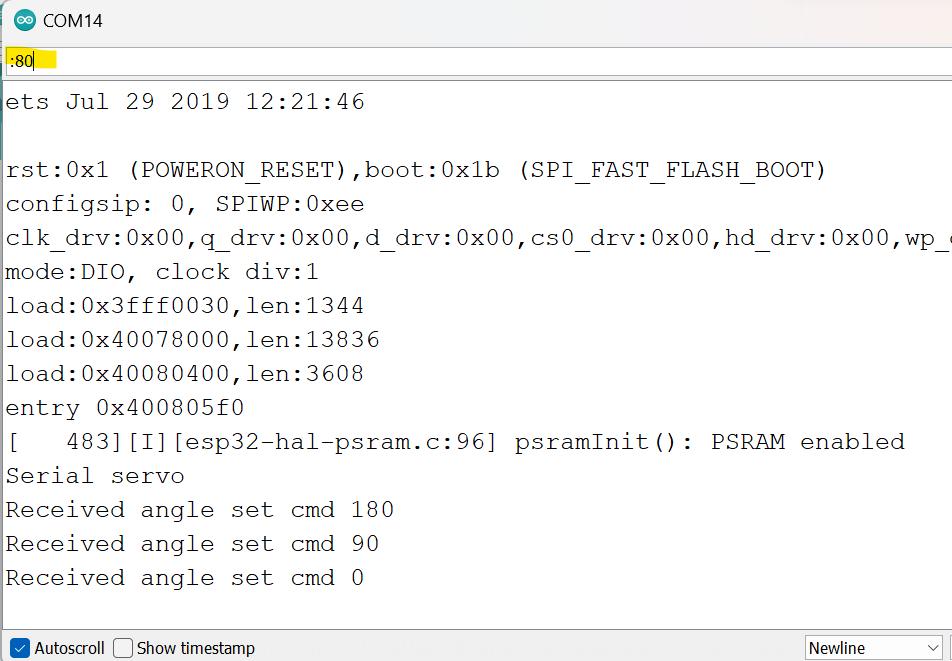
To test the code, load the sketch and open serial monitor. send :180 from the serial monitor (you need to select newline terminating character).
Controlling servo angle from browser
we can use the same arduino program for receiving commands from the browser. We can use the webserial api to send serial commands from the browser itself (the slider is taken from roundslider.com).
To test the code, connect the ESP32 dev board to computer and click on open button, then select the appropriate COM port from the presented list. Then move the slider to change the servo position ( you need to close the arduino serial monitor before trying connect from the browser )
We subscribe to the value change event of the slider, then on every change event we extract the slider position, it will be a value from 0-100. we multiply this value with 1.8 to convert it 0-180 range.
$("#handle2").roundSlider({
    sliderType: "min-range",
    radius: 130,
    showTooltip: false,
    width: 16,
    value: 0,
    handleSize: 0,
    handleShape: "square",
    circleShape: "half-top",
    valueChange: function (args) {
        let angle = Math.ceil(args.value * 1.8)
        sendAngle(angle);
    }
});
The sendAngle method takes this angle and prepare the required command and sends it to the serial output stream.
function sendAngle(angle) {
  console.log("setting servo to "+angle);
  if (port == null) {
    console.log("port is not ready");
    return
  }
  let cmd = `:${angle}\n`;
  const writer = outputStream.getWriter();
  writer.write(cmd);
  writer.releaseLock();
}
full code is available at this repo.
For controlling servo using serial console or using browser, we need to physically connect the ESP32 dev board to host computer. If you want to control servo wirelessly (through network), you can checkout this post which describes how to set servo angle using an android app. There is a great article on RND which talks about setting servo angle using a webpage that is served by esp32 itself.


