MicroPython: Controlling Servo With ESP32/NodeMCU
Servos are exciting devices. We can get precise posting with minimal code, all you need is a controller that can produce PWM at 50Hz. In this post we will understand how to use ESP32 to control Servo. We will be using micropython to program ESP32/NodeMCU. The grate thing about MicroPython is that it is platform independent (mostly), which means code written for NodeMCU (ESP8266) can be used on ESP32 as well.
To use MicroPython on ESP32, First we need to load MicroPython Interpreter. Check out ESP32 – Getting started with MicroPython post to load interpreter and tools you can use with micro python. If you are using NodeMCU, then refer to this post
MicroPython has PWM support. You can find full documentation of PWM library here.
Environment requirements:
You need a ESP32 or NodeMCU
Machine with uPyCraft to load python files to the device
Controlling Servo:
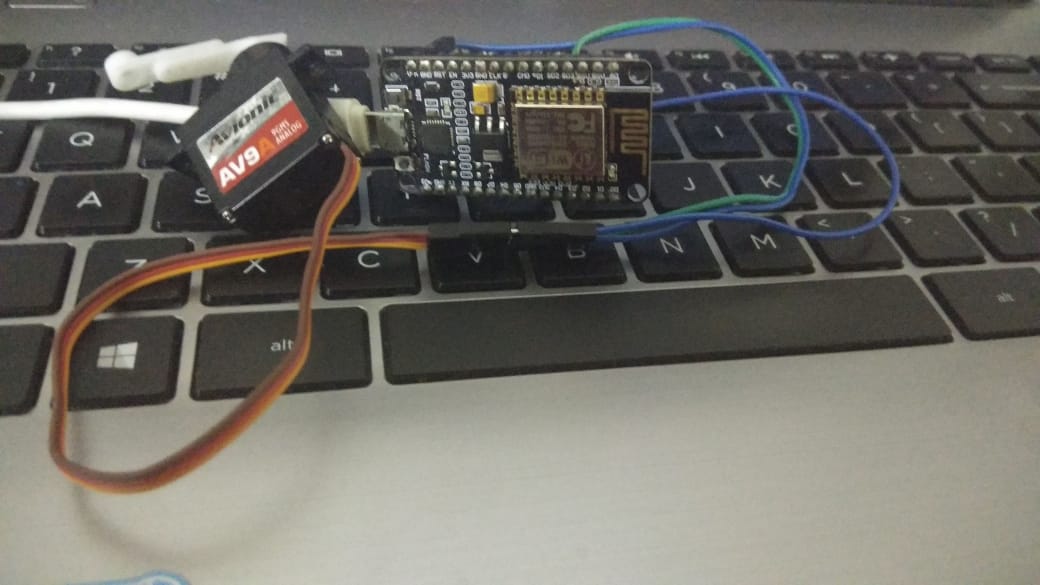
Connect servo signal pin to GPIO2 of the ESP, you need to power the servo as well
Code
All you need is couple of python lines to control the servo, how easy is that
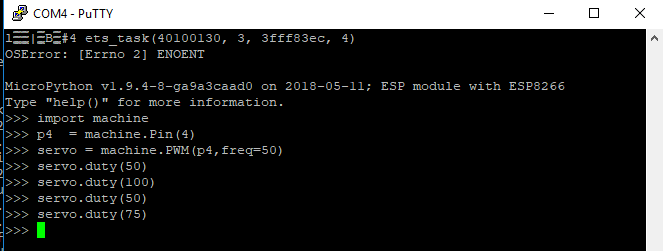
import machine
p4 = machine.Pin(4)
servo = machine.PWM(p4,freq=50)
# duty for servo is between 40 - 115
servo.duty(100)
The PWM method of machine takes two inputs, the pin to which you want connect servo (in case of ESP8266 you can choose one from 0, 2, 4, 5, 12, 13, 14 and 15) and frequency of the PWM signal. Most of the hobby servos work with 50Hz PWM, so we choose that. Then you can use duty method to set the angle
you can call servo.duty() method to change the set the servo angle


I tried this code with 180 servo motor and it works but with 360 servo motor is not rotations. Can you please help me to run 360 servo on esp32 micropython?
Most servos only operate in a 180 degree motion. If you need 360 motion you may want to consider a stepper motor.