CircuitPython: Controlling Servo With Wio Terminal
We have already seen how to control a servo using esp32 here. In this post we will see how to control the servo using Wio terminal and the CircuitPython combination.

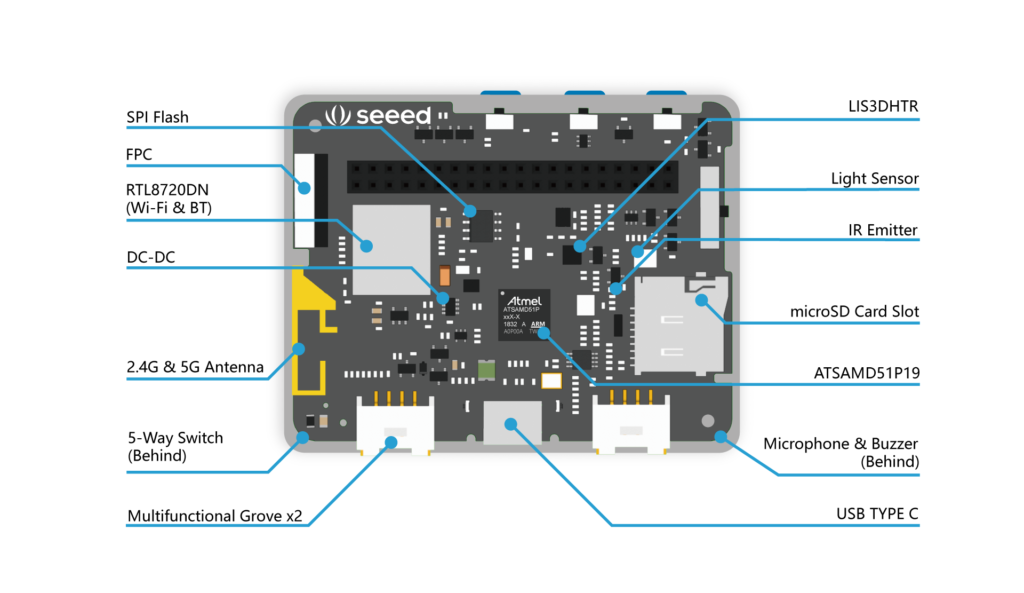
Wio terminal is ATSAMD51 based all in one smart development platform for embedded developers. It provided both WiFi and BLE 5.0 functionalities through on board RTL8720DN chip.
Features of Wio Terminal
- Controller : ATSAMD51P19 – 120MHz, 4MB External flash, 192KB RAM
- Wireless : RTL8720DN – 2.4Ghz/5Ghz WiFi, BLE 5.0
- USB : Can act as both USB host and USB Client
- On Board peripherals : LCD Screen (320×240), Accelerometer (LIS3DHTR), Microphone, Speaker, Light sensor, IR emitter
- Development platform : Arduino, CircuitPython, ArduPy
All this packed into a nice, easy to carry box.
Loading CircuitPython into Wio
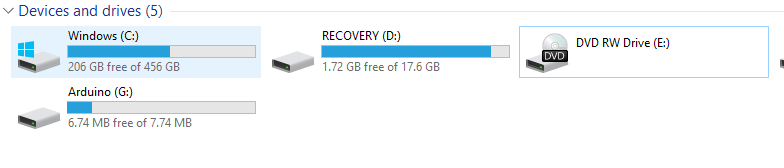
Connect and Wio to a computer and put it wio in boot-loader mode (slide the power switch of wio twice to put the board into boot-loader mode). New Arduino drive will appear in your computer. Get the latest version of CircuitPython firmware and place it in the Arduino drive. Once the firmware file is placed in the Arduino drive, the drive will be disconnected and a new CIRCUITPY drive will appear

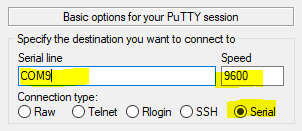
I will be using REPL to interact with the board, you can use any serail console, I am using putty here.

Once you are in REPL, you can interact with the board.
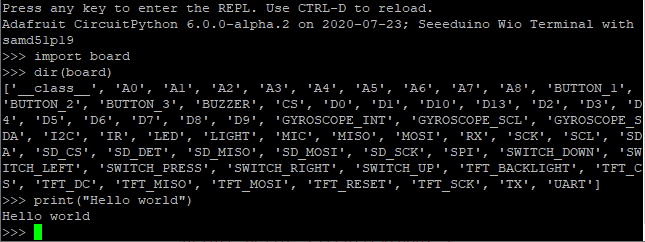
First lets control the on board LED (blue led near the USB connector)
import board
from digitalio import DigitalInOut, Direction
led = DigitalInOut(board.LED)
led.direction = Direction.OUTPUT
led.value = True
led.value = False
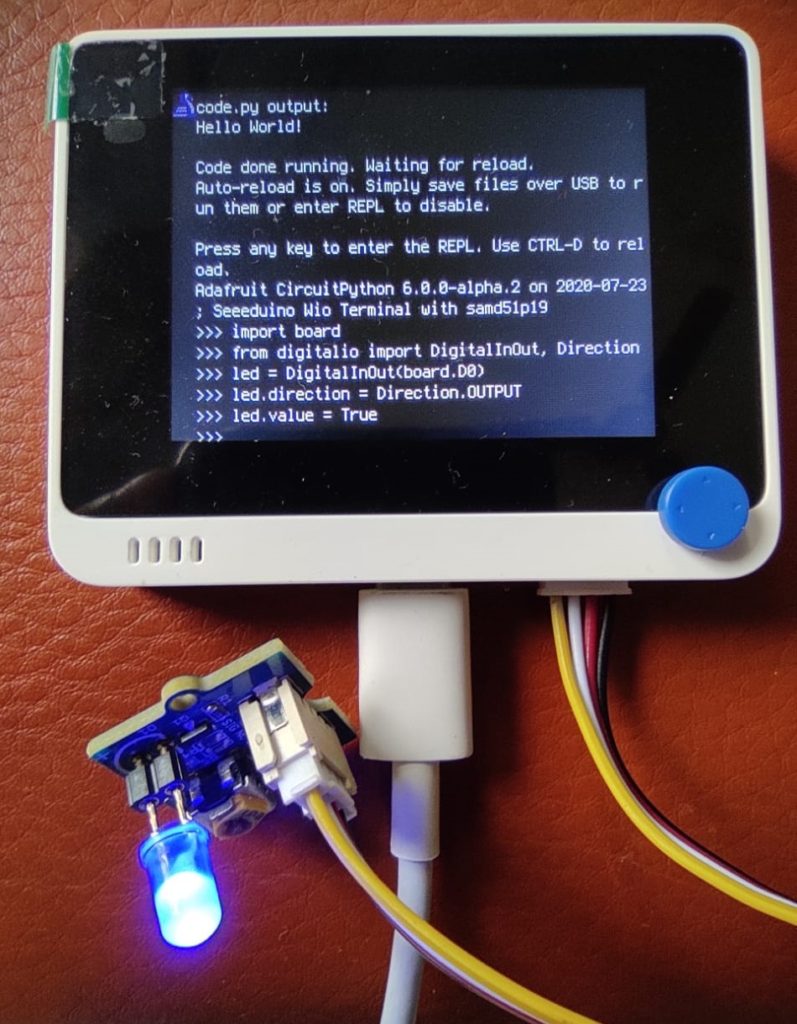
If you have a grove led board, you can control it by toggling D0
import board
from digitalio import DigitalInOut, Direction
led = DigitalInOut(board.D0)
led.direction = Direction.OUTPUT
led.value = True
To control the servo connect servo signal pin to D1 and power the servo from external power supply (don’t use the on board 3v3 to power the servo). Run the following snippet to change the angle. We can change the angle by setting different duty cycles. Most of the servos requires 50Hz signal, check datasheet of your servo, if it doesn’t seem to work.
import board
import pulseio
#duty for servo is between 40 - 115
servo = pulseio.PWMOut(board.D1,frequency=50,duty_cycle=40)
servo.duty_cycle = 100


This is an excellent example! Thank you very much for your time in creating this.
I am looking for a good example of how to communicate with the GPS that is on the new Lora modle that includes the E5 Lora Chip and a seperate GPS module.
I believe I need to setup the GPS as a uart, but I do not know how to correctly specify the pins in circuitpython.
An example of getting lat and long from the GPS would be so helpful!
Thank you for your time..
Ken