Getting started with Junit
In this blog we will see how to setup unit testing for a java project.
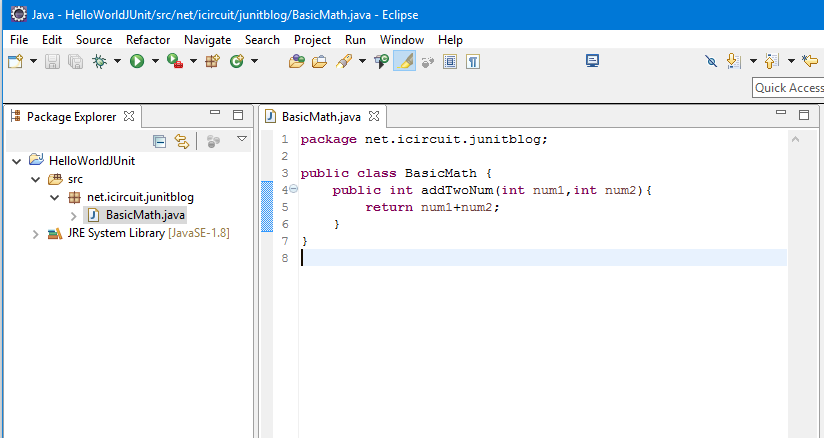
Fist create a java project and a simple class. I created a simple class with one method, the method adds two numbers and returns the sum.
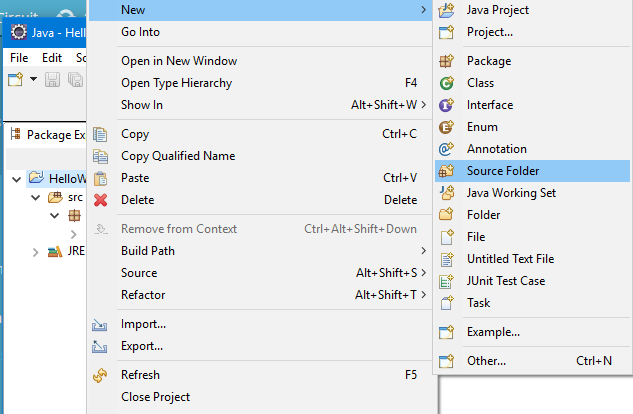
eclipse puts all the source files in folder called src, we will put all the test classes in a folder named test.
Creating Test folder:
Right click on the project -> new -> source folder
name it as test
Creating a Test Case:
Now we need to create a test class, right click on the BasicMath.java -> New -> Junit Test Case
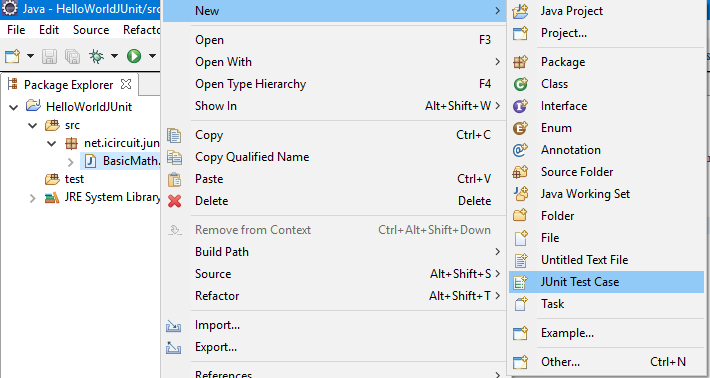
The only thing you need change is the Source folder, point it to the test folder we created.
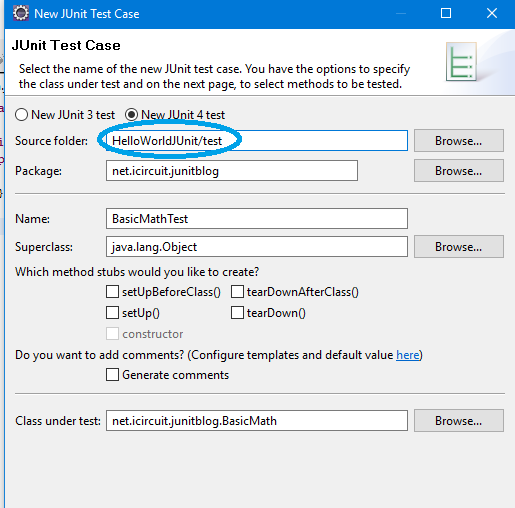
Click finish, you will be asked to add the JUnit 4 to the build path , click ok.
A new test class will be created, your project should look like something below.
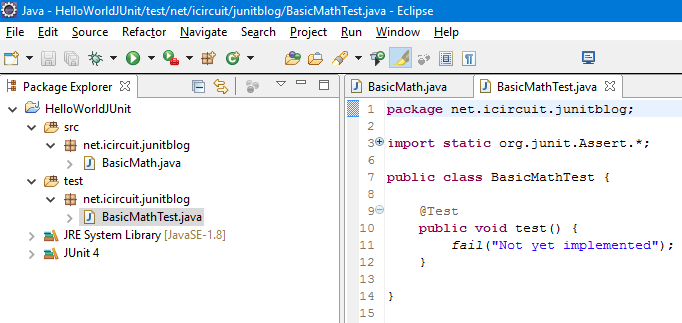
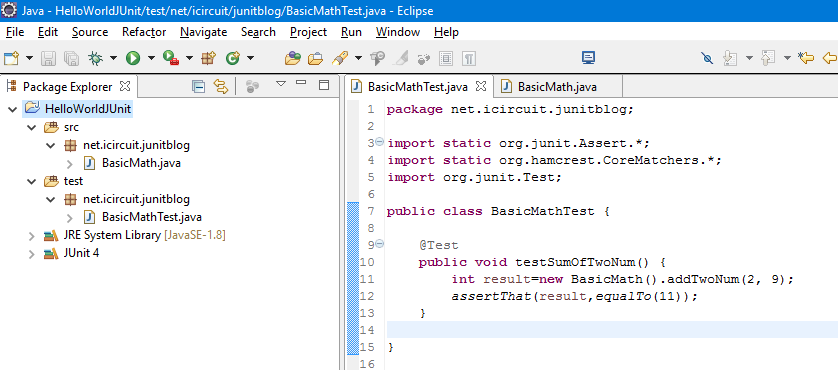
You can add your test logic in the test method, you can change the test method name to something meaningful. Junit will run all the methods with annotation @Test.
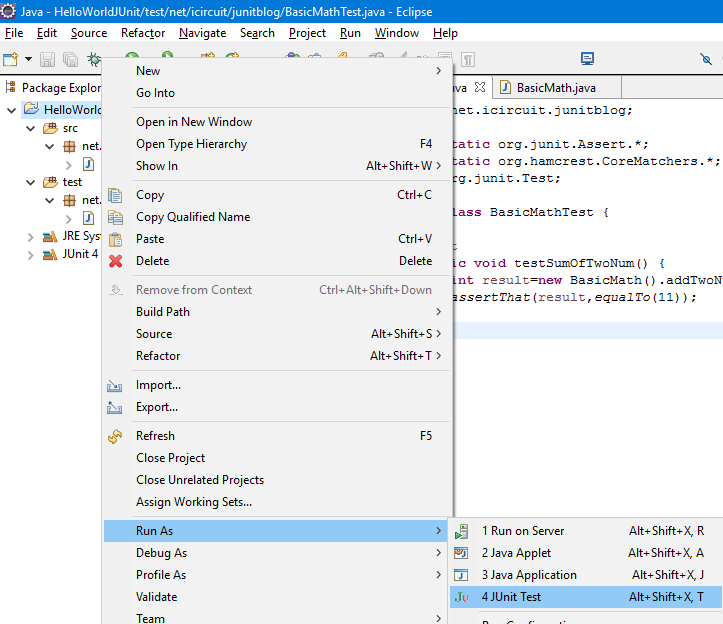
Run JUnit Test:
You can run the test now, right click on the project ->Run As -> JUnit Test
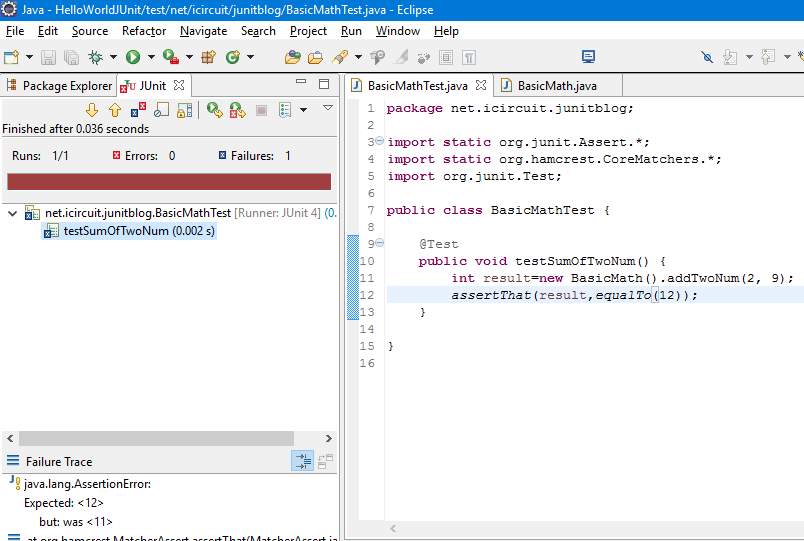
The test will succeed, you will see a green bar.

A failure test case looks like the following