Getting started with Raspberry Pi
There are many blogs describing how to setup raspberry pi , but in this blog I will show you how setup raspberry pi with out monitor,keyboard and mouse. Instead of using a dedicated monitor to raspberry pi we will setup raspberry pi using our computer/laptop. We can do this through remote log in.
What we need:
1. Raspberry Pi (B / B+ )
2. Micro SD card (at least 8 GB)
3. LAN cable
4. Router to which you have admin access
5. Desktop/Laptop (Android mobile also will work)
I am assuming that your working from a windows meachine. First you need to download win32 Disk Imager. Then download RASPBIAN OS for Raspbeery pi from here
Connect your SD card to the computer.
Install and run win32 Disk Imager with Admin rights.
Now connect SD card and LAN cable to the Raspberry pi. Once you switch on the Raspberry pi you can see the IP address of your Pi in your router web interface.
Once you have IP address of your Pi you can connect to it through putty.
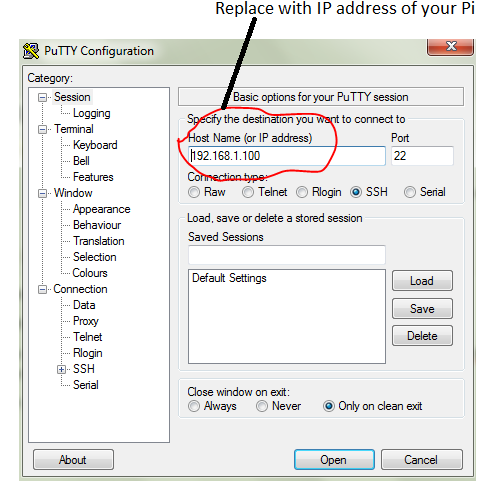
Click on “Open” , it will ask for user name(default user name is pi and password is raspberry )
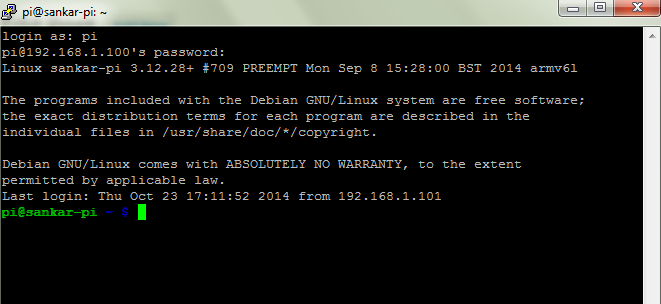
Now to do initial setup run the following command
sudo raspi-config
If you want to have GUI access you need to install one additional program on Raspberry pi
Run following command in putty
sudo apt-get install xrdp
Once this app installed, you can connect to the Raspberry Pi through Remote Desktop Connection
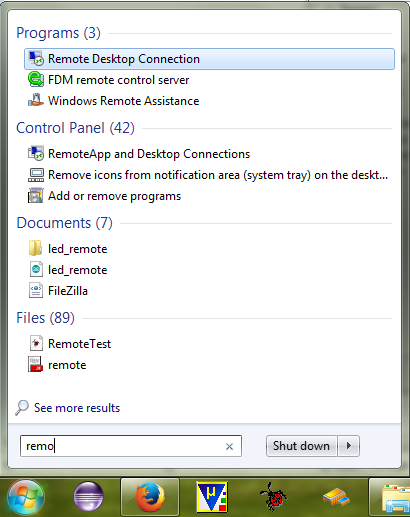
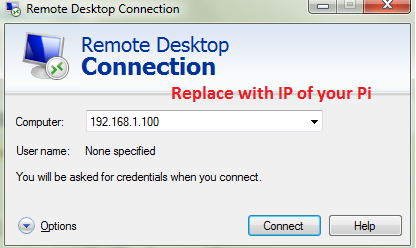
Click on connect , you will a screen asking for user name and password(give the same credentials that you used in putty ). In Module select sesman-Xvnc if it is not selected.
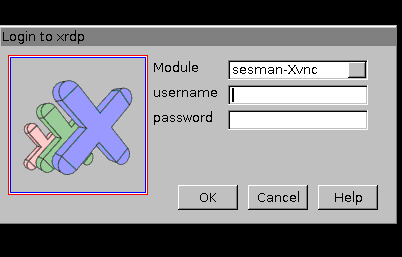
Click on Ok…now you are connected to your Raspberry pi.
Note: If your using serial port of Pi for your own applications, you need disable the serial port for kernel. you can find this option in raspi-config

