How to install MicroPython on ESP32
MicroPython is a customized implementation of python3 for constrained environments such as microcontrollers. MicroPython also implements a subset of python standard libraries. Apart from standard libraries, community added several libraries for interacting with various sensors and peripherals. You can see full list of boards that support MicroPython on this page. In this post we will see how to install MicroPython on to ESP32 controller.
What you need
- ESP32 development board
- PC to flash the MicroPython firmware
If the ESP32 development board doesn’t have an on board USB-Serial converter, you need an external USB-Serial converter. The serial converter board need to be in 3v3 mode. Generally there will be jumper on the converter that allows you to select the voltage level.
Serial board to ESP32 connections
| ESP32 | Serial board |
| GND | GND |
| IO1 (Tx) | Rx |
| IO3 (Rx) | Tx |
Putting ESP32 in download mode
If the development board has on board USB-Serial converter, it will automatically put the ESP32 controller in download mode when we try to load firmware from the PC. If your board doesn’t have the converter, then we need to put the controller in download mode manually.
Connect both IO0 and IO2 to gnd and press the reset, ESP32 will enter download mode. Now we can upload program from PC. After the program is uploaded, remove the IO0 and IO2 connections and reset the board.
Installing MicroPython on ESP32
Connect the ESP32 dev board or the USB-Serial converter (FTDI) board to PC and find the COM port, one windows it will be available in the “Device Manager”.
Download the appropriate binaries for your board from here. If your board has SPIRAM (ESP32 WROVER modules will have SPIRAM), you need to download a version that has this support, my board is based on ESP32 WROVER, so I am loading v1.22.1 with SPIRAM support.
Installing MicroPython on ESP32 using ESPTOOL
ESPTOOL requires python3.7 or above. Once python is installed, we can check the installed python version using the following command.
python --versionThen install esptool using pip. After installation is completed we can flash the firmware using the following commands.
pip install --user esptool
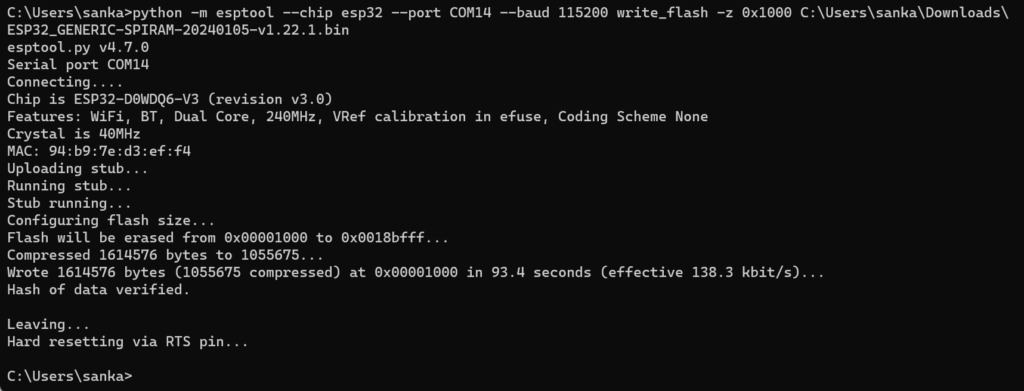
python -m esptool --chip esp32 --port COM14 erase_flash
python -m esptool --chip esp32 --port COM14 --baud 115200 write_flash -z 0x1000 C:\Users\sanka\Downloads\ESP32_GENERIC-SPIRAM-20240105-v1.22.1.binInstalling MicroPython on ESP32 using browser
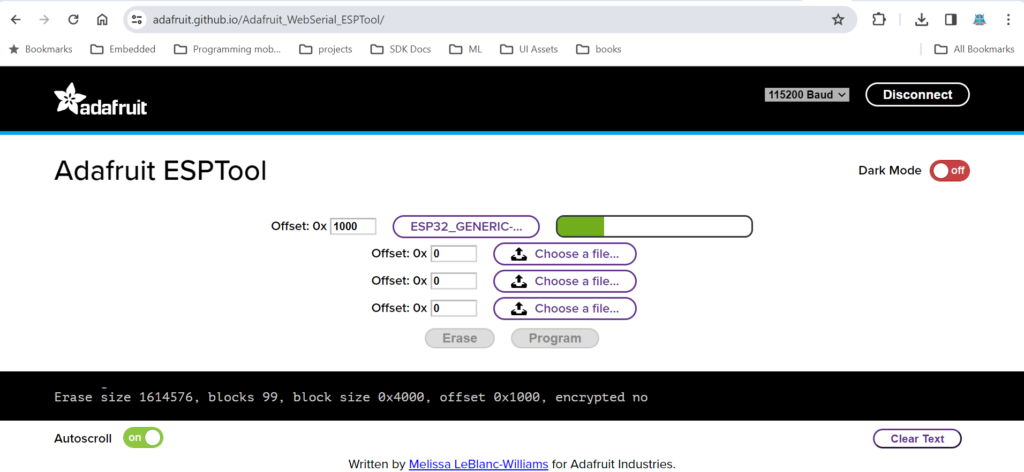
Chrome has support for interacting with COM ports from web applications. Adafruit has web esptool which allows us to load the MicroPython binary from the browser itself (no need to install python or the esptool), open Web ESPTool and click on connect. Provide offset as 0x1000 and browse the downloaded MicroPython binary. It will show the file selected
Installing MicroPython on ESP32 using Mu Editor
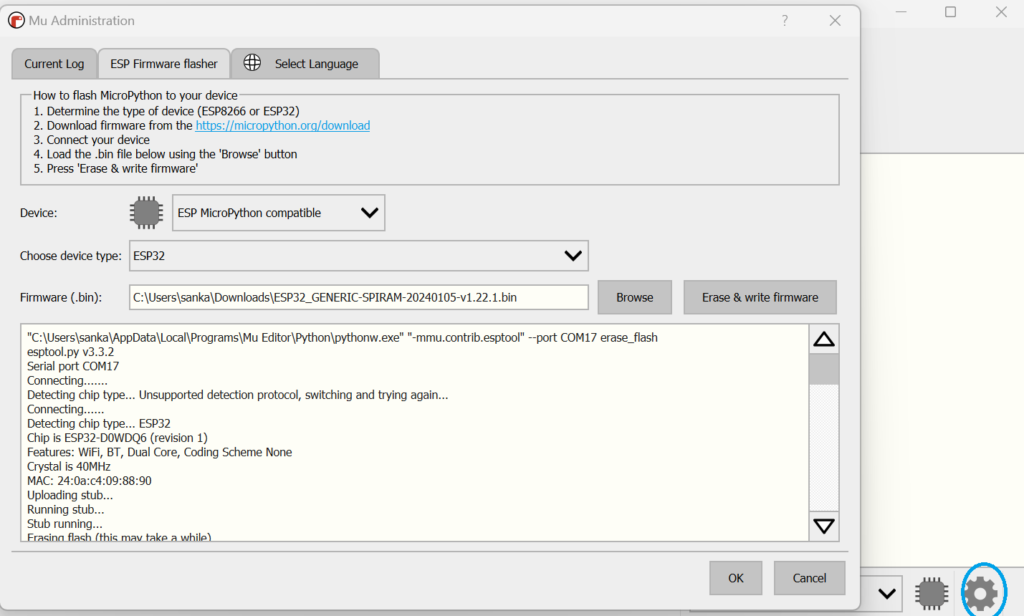
Mu Editor is an open source editor for micro python and circuit python. It has support for several boards, install Mu Editor and set it in ESP mode.
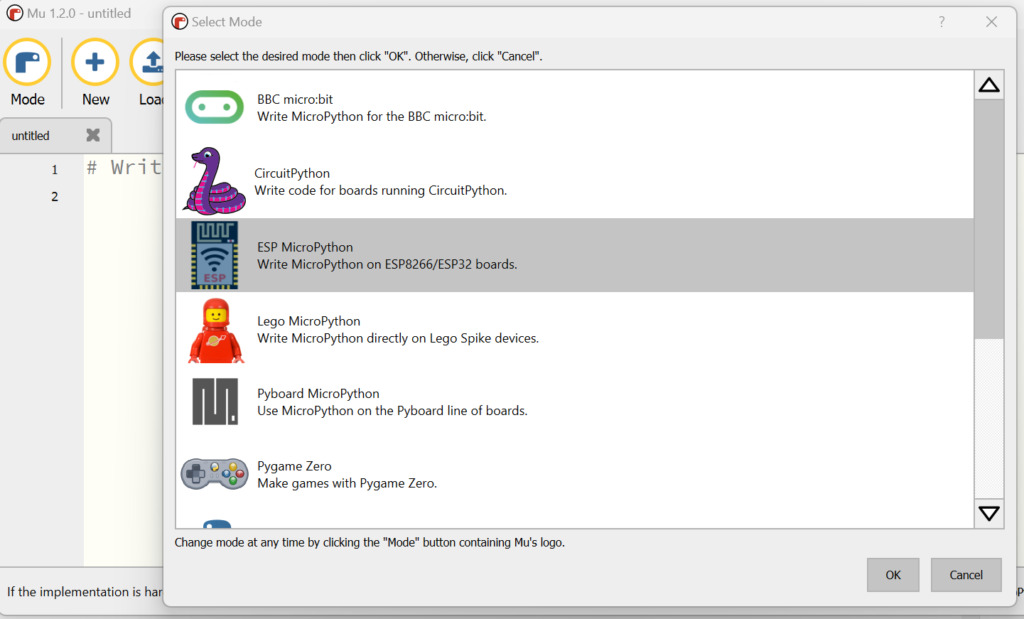
Click on the gear icon at the bottom right corner, it will open the Administration window. We can flash the MicroPython binary using “ESP Firmware flasher”.
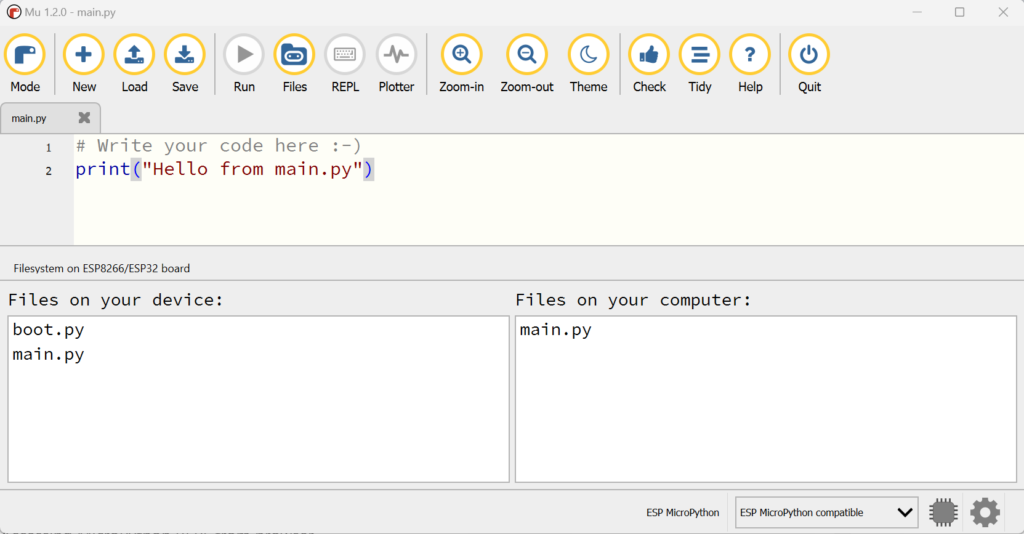
We can also upload the files from PC to ESP32. Click on Files icon, it will show side by side view the files. We can drag and drop files from computer to device. When the device boots, it will start executing the main.py script.
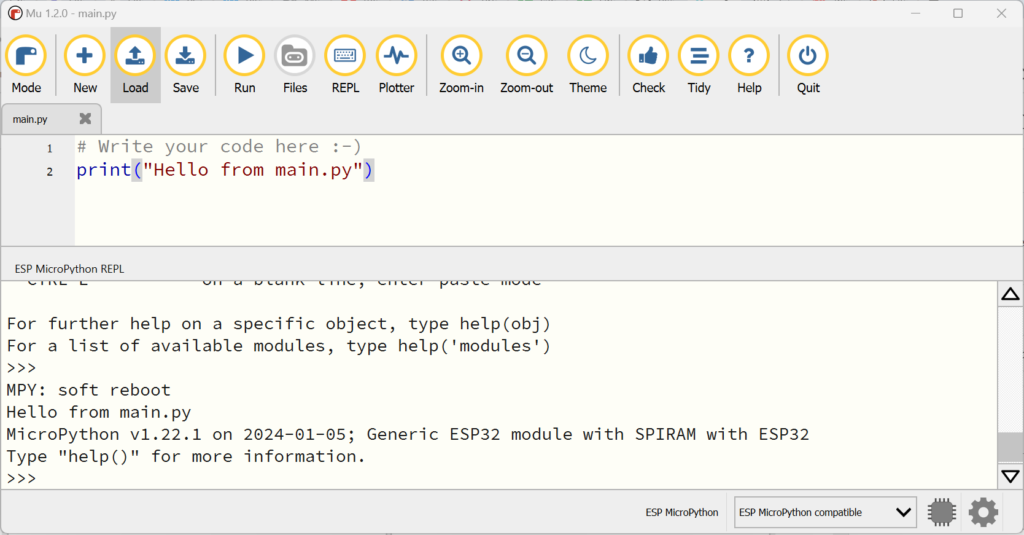
Mu editor also has support for REPL mode, simply click on the REPL icon, a REPL window will open at the bottom.
Interacting with REPL
To interact with REPL, we need a serial terminal software. There are several terminal software for different platforms.
Accessing MicroPython REPL from browser
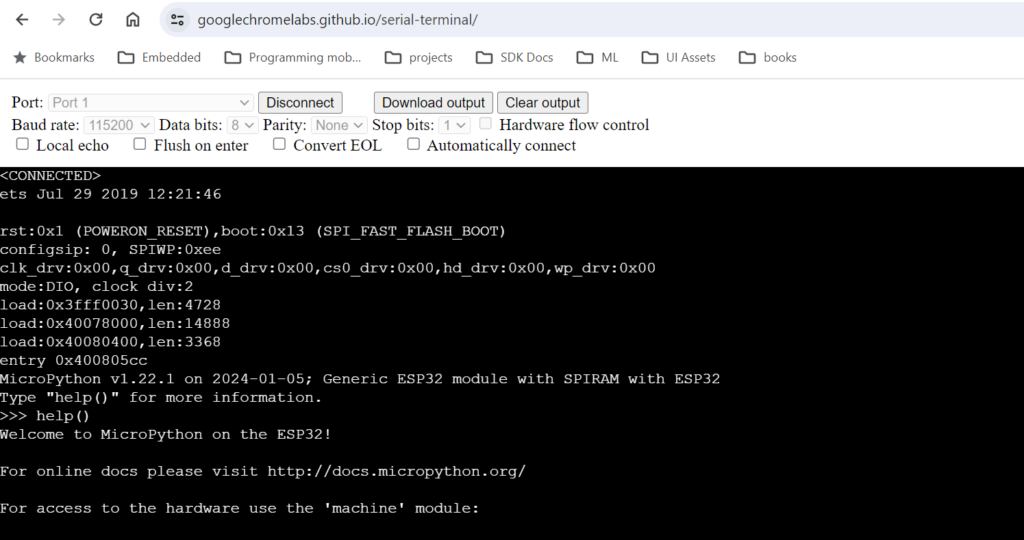
open the following link in a chrome or edge browser and click on connect to select the com port. Once the port is connected, reset the ESP32 board, you should see following prompt.
https://googlechromelabs.github.io/serial-terminal/
Accessing MicroPython REPL using putty
putty is a popular SSH client for windows. putty can also act as terminal emulator. Download latest version of putty from here.
Click on open and reset the ESP32 controller. REPL prompt should appear as seen below.

