ESP IDF : Setting up eclipse for ESP 32
In the previous blog we have see how to setup arduino to work with esp32, that was fairly easy, in this blog we will see how to setup eclipse to work with the esp32…compared to arduino this is a bit complicated.
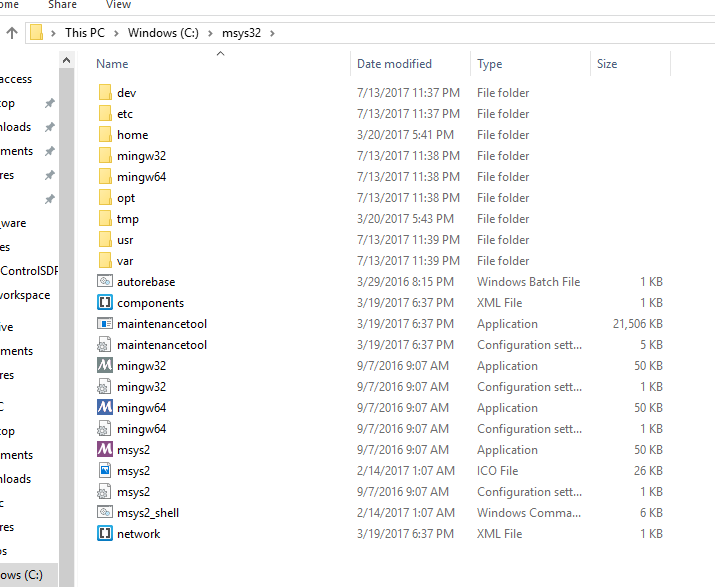
To develope apps with ESP IDF, we need get the toolchain first, you can download preconfigured MSYS2 from here . Extract the zip to C drive
run mingw32.exe
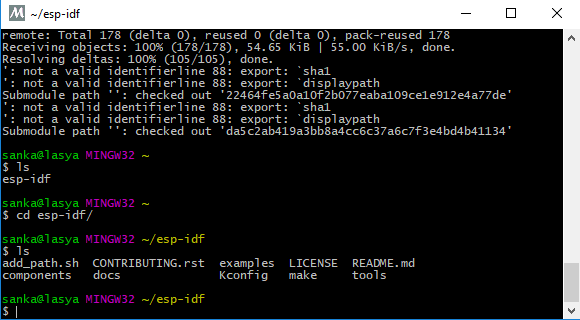
now we can clone the IDF git repo (you can ignore any errors that are printed on console)
git clone --recursive https://github.com/espressif/esp-idf.git
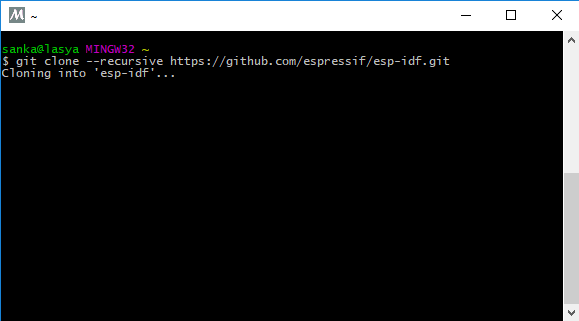
once the command completes, IDF will be available in esp-idf folder
we can turn to eclipse now, you can get eclipse from here . Download appropriate version for your platform.
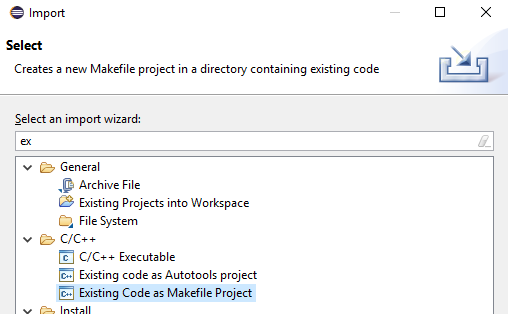
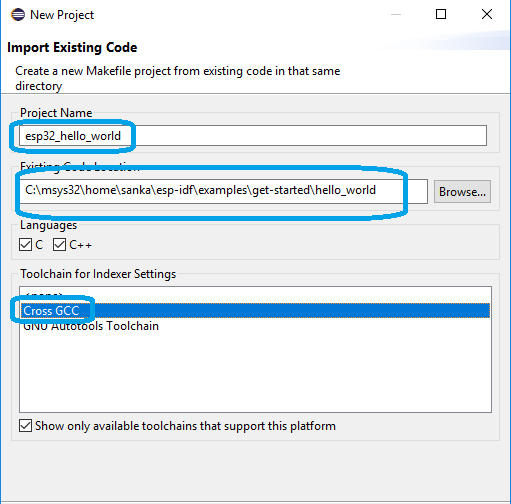
launch eclipse, we will import a example project from IDF
goto File->Import -> Existing Code as MakeFile Project
Give a name and select CrossGCC as toolchain
Wait until project is imported, once import completes right click on the project and select properties.
In Build environment add the new variables (marked in the screenshot)
V : 1
IDF_PATH : C:/msys32/home/{user-name}/esp-idf
PATH : C:\msys32\usr\bin;C:\msys32\mingw32\bin;C:\msys32\opt\xtensa-esp32-elf\bin
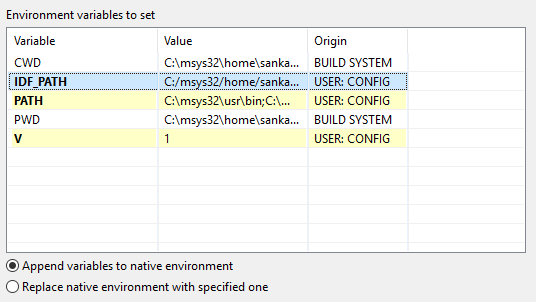
click on Apply button once you made the changes
Select C/C++ Build , in Builder Settings uncheck “Use default build command”
copy the following in the command box
bash ${IDF_PATH}/tools/windows/eclipse_make.sh
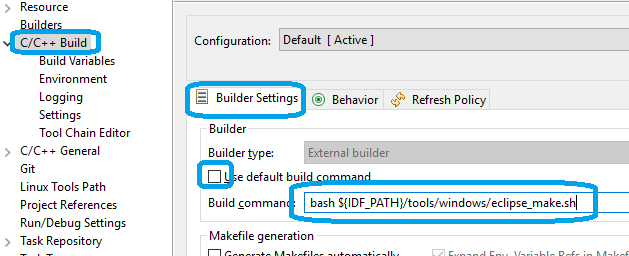
Click on apply button and select C/C++ General tab, we need to change couple commands here
make the following change in Compiler Settings
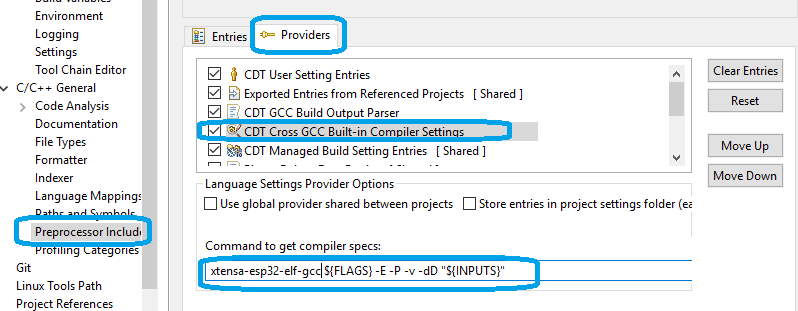
In Output Parser add xtensa-esp32-elf- at the beginning of the line
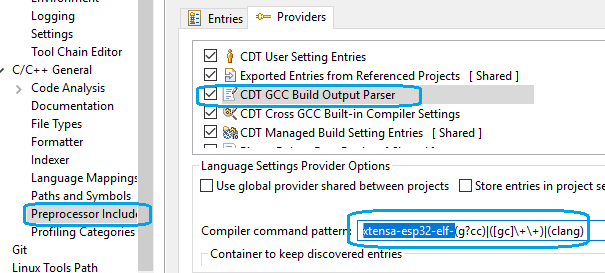
now click on apply again ,then click on Ok button
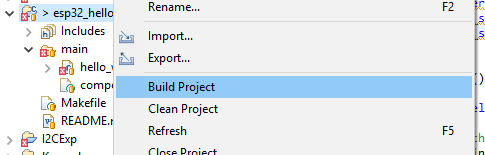
now we can build the project
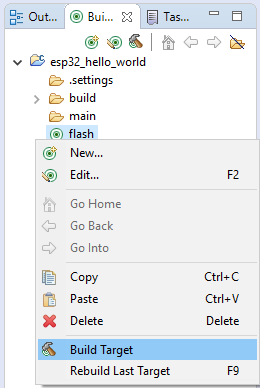
To Flash the compiled code to the dev board, we need define a target
Select Build Target on right side of the IDE, right click on the project, select new
provide target name as flash and click ok
Before we can flash we need set our serial port details
Goback to mingw console and navigate to
/home/{user-name}/esp-idf/examples/get-started/hello_world
export IDF_PATH then run make command
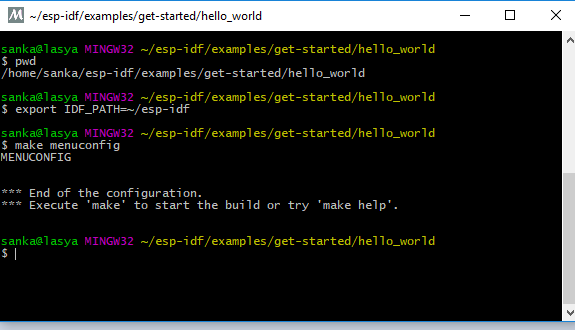
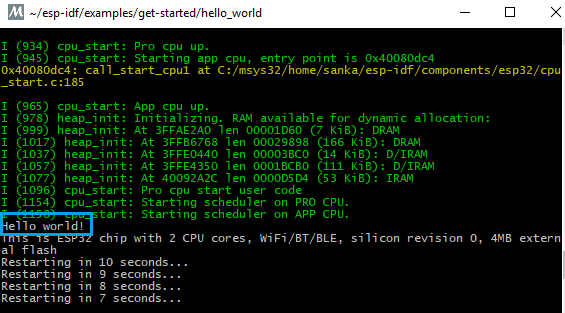
you will get blue screen like the following
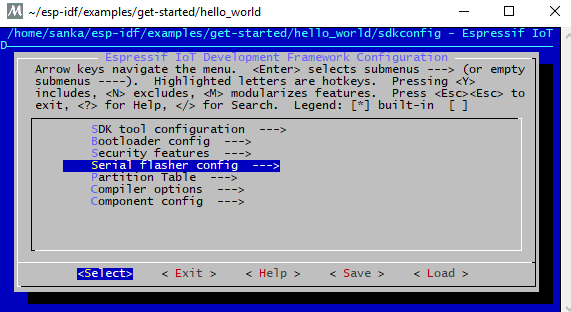
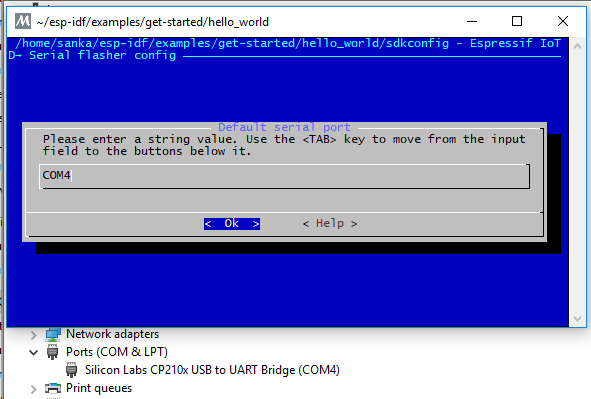
the final settings should look the following

You can start flashing by right clicking on the flash and selecting Build Target
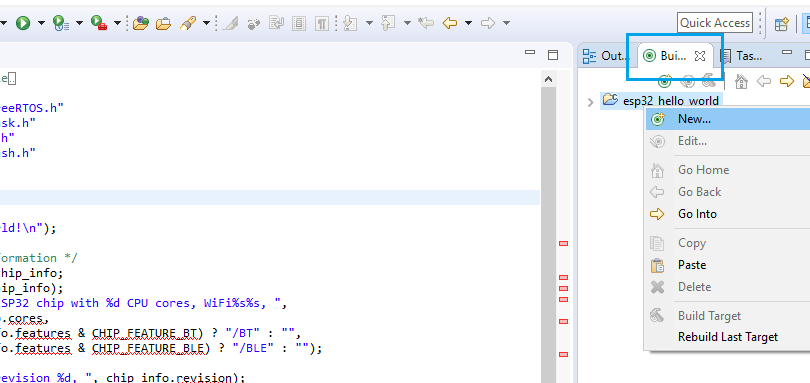
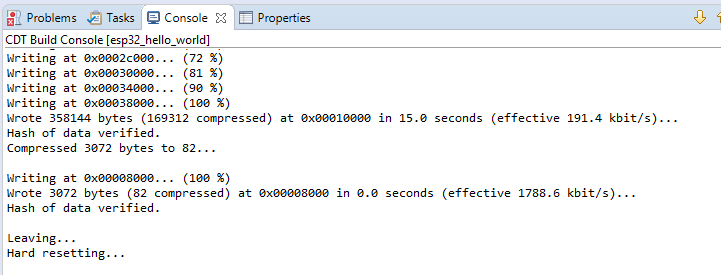
You can see the log in console
if you want see the hello world! in serial run make monitor in mingw console
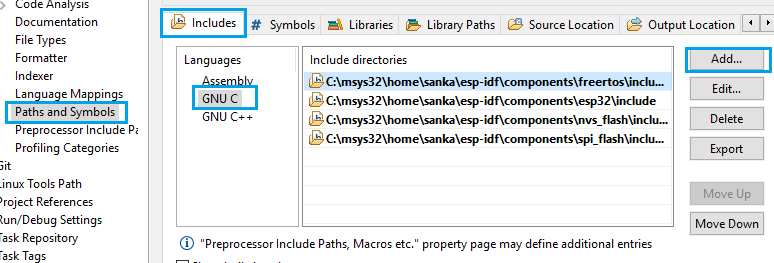
Eclipse might show errors saying that it can’t find the include files, nevertheless the build will succeed. You can get rid of this errors by adding the include folders manually
Properties -> C/C++ General -> Path and Symbols -> GNU C


Kudos for this great tutorial! Confirmed working on System Workbench for STM32.
I didn’t get the IDF through git tough, I just downloaded it from Expressif.
At first, the toolchain didn’t find the default path /dev/ttyUSB0 on my Windows 10 PC, so the flashing failed.
Just add the environement variable ESPPORT and set it to your Windows serial id (COM8 in my case).
Kind Regards,
massimo
Glad, it helped you, massimo.
Thanks, went through several guides with no luck, yours worked great and is very easy to follow.
glad, it helped you
Good tutorial, I followed the steps, it is working in terminal mode nicely. Configured Eclipse as per the steps, but i am unluckky. Can you help me in sorting out the problems.
what is the exact problem you are facing with eclipse ?
We had an issue, while we do make menuconfig. [below snapshot]. cryptography and pyelftools. We know this is related to python installation but any directions here to get the repo or package installed right.
$ make menuconfig
The following Python requirements are not satisfied:
cryptography>=2.1.4
pyelftools>=0.22
also not sure if the right comment thread to ask mingw32-gcc is not available in bin, trying to install. is there anything which was followed wrong?
Are you trying to install on Windows ?
All the dependencies should be available in mysys package
Hi,
I am getting error as
Error: Program “bash C:\msys32\home\User\esp-idf\tools\windows\eclipse_make.sh” not found in PATH