STM32 with Arduino IDE
I recently bought blue pill board (STM32F103C8T6) from ebay , this is a inexpensive STM32 board. We can actually use Arduino IDE to program these boards. In this blog we will see how to setup arduino IDE and program this board
BluePill Key Features :
- ARM32 Cortex M3
- 72 Mhz
- 64K Flahs, 20K SRAM
- 7 Timers
you can see more details about the controller in ST site
The setup process is fairly simple, you just download this git repo , and extract it to your arduino hardware folder, if you restart arduino , STM32 boards should be available in the board selection list
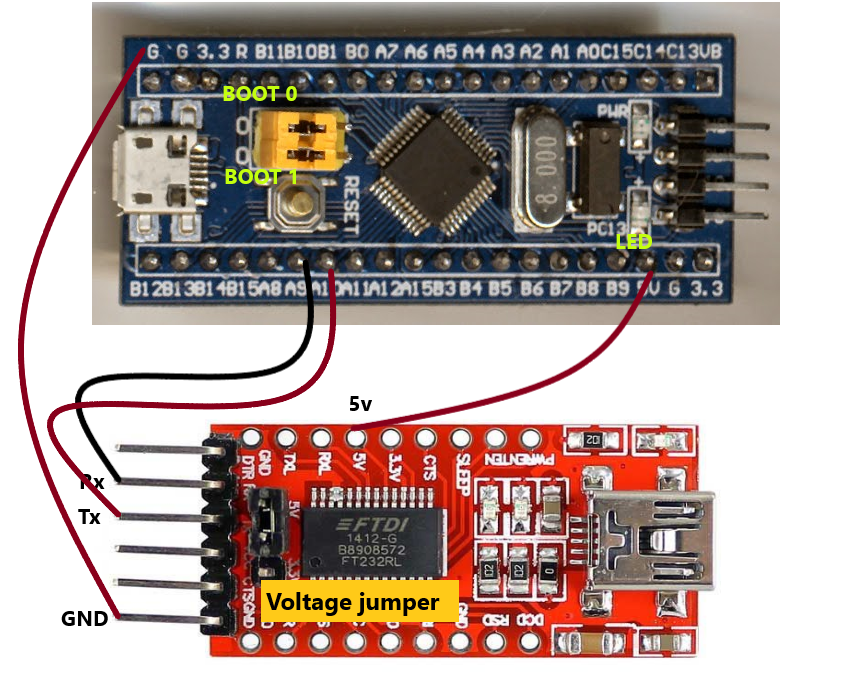
This board doesn’t have on-board usb-serial converter , we need to connect a external converter in order to program it .
The controller is 3v3 level , you have to put your serial converter in 3v3 mode before connecting it to blue pill

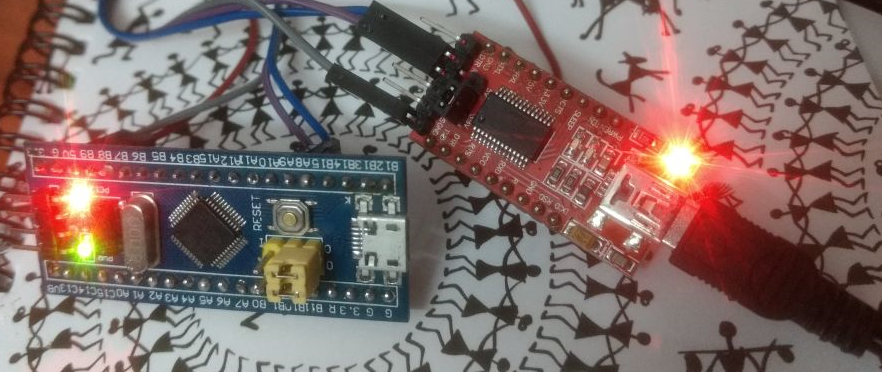
Hardware Connections :
Put the BOOT0 zumper in 1st postion (when the BOOT0 is 1st , the board will wait for program update on serial line, means it will not execute the previoulsy flashed program, once you load code, the program will be started. if you load the code again press reset. For starting the program automatically put the BOOT0 back in 0th position)
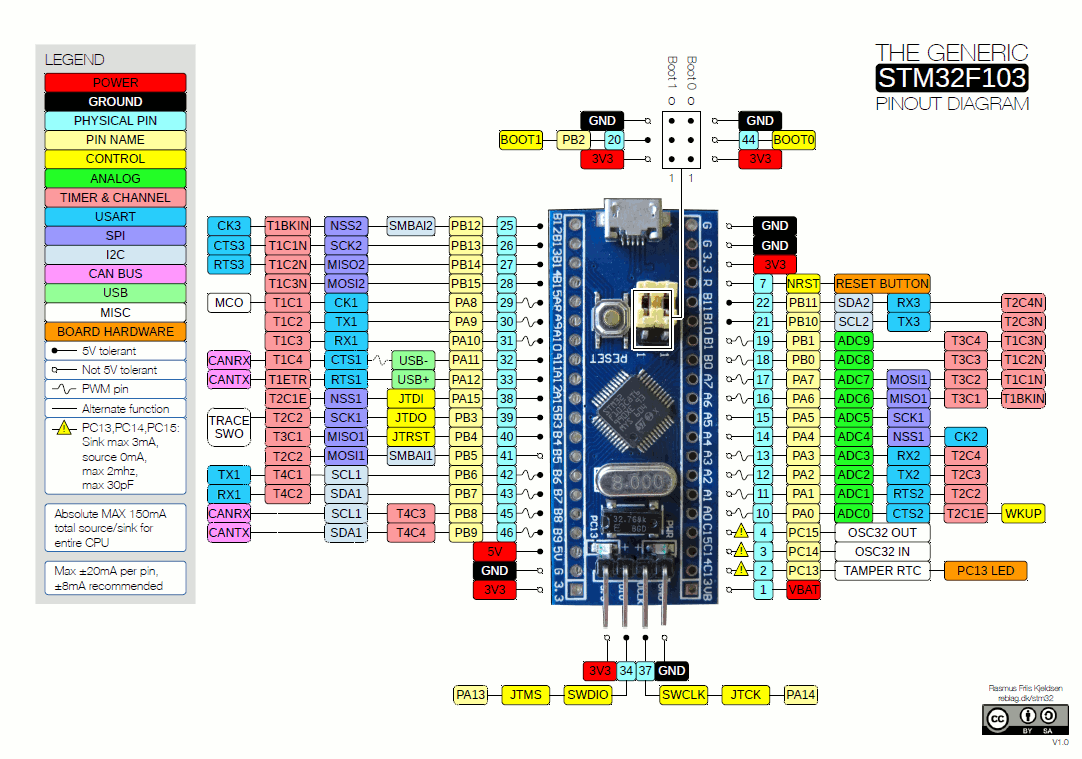
- Connect Tx line of serial board to A10 (PA10)
- Connect Rx line of serial board to A9 (PA9)
- You can provide 5v from Serial board to the BluePill (5v)
- Connect together the GNDs of both boards
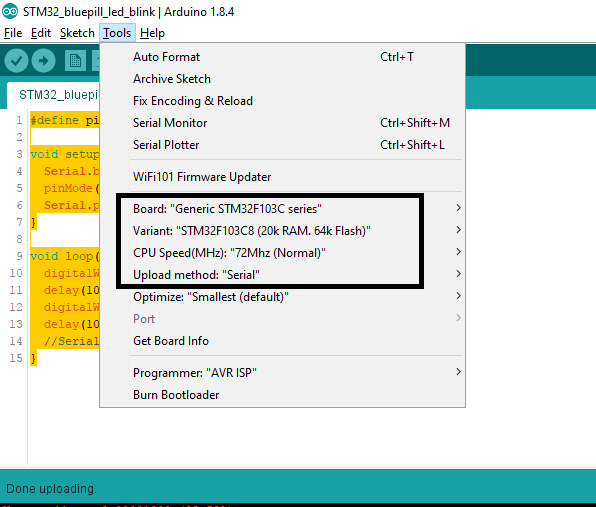
Change the Arduino board selection as shown below
Blue Pill Blinking LED Program
/*for blue pill , the on-board led is connected PC13*/


#define pinLED PC13

void setup() {
 Serial.begin(9600);
 pinMode(pinLED, OUTPUT);
 Serial.println("START");
}

void loop() {
 digitalWrite(pinLED, HIGH);
 delay(1000);
 digitalWrite(pinLED, LOW);
 delay(1000);
 //Serial.println("Hello World");
}


could you please help in sdcard read and write using bluepill board and you have code for that please send/ post me in reply
we can install STM32 board by using arduino boards manager
https://raw.githubusercontent.com/stm32duino/BoardManagerFiles/main/package_stmicroelectronics_index.json