ApolloV3 AI on Edge made my Sunday a Funday!!
What is FUN?
Fun is defined as or fun is made of a ‘DOSE’ of brain chemicals: Dopamine, Oxytocin, Serotonin, and Endorphins .
it’s the unique experience of external events that activates these neurochemicals.
whatmany of the fun times seems to have in common is the ability to transport us out of ourselves.
Making something creates this fun for me (this hardware vendor name is Spark”FUN” which is coincidence.
In this post we will setup Sparkfun appolloV3 on a windows 10 machine. We will load the example program which will blink an LED when we say YES
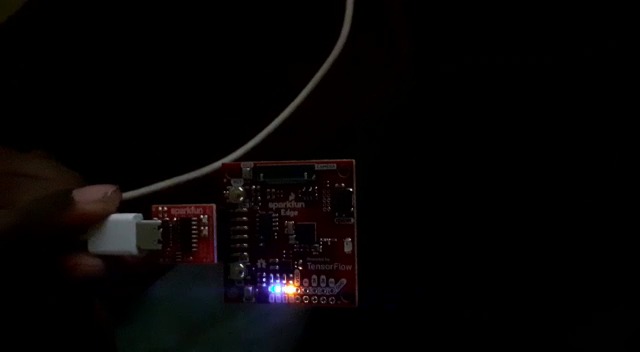
What is ApolloV3 blue?
SparkFun’s Edge Development Board is based around the newest edge technology and is perfect for getting our feet wet with voice and even gesture recognition without depending on cloud services. Working on cloud for inference is common practice, whether this inference can be made at edge itself is the basis for this board
Hard Ware Setup
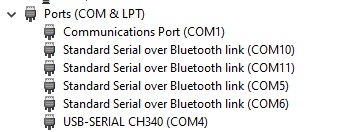
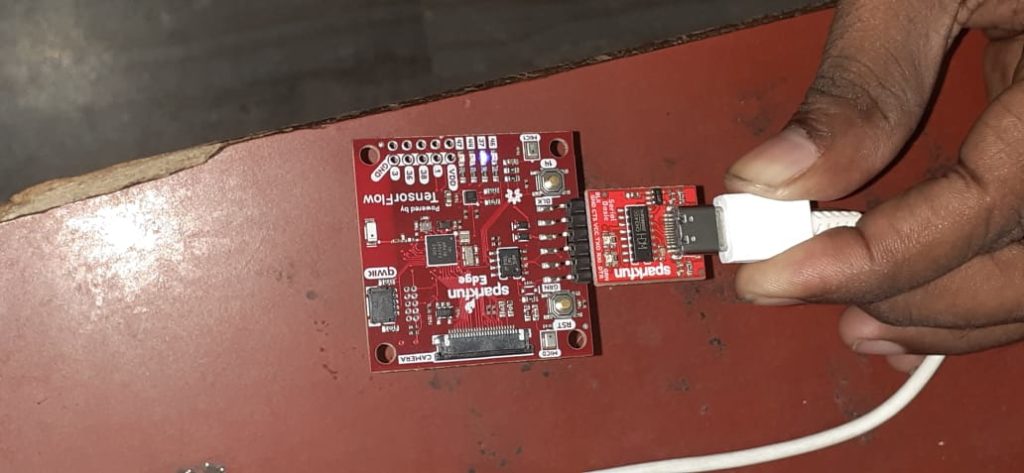
Connect serial programmer and find the COM port (In my case it is COM4)
Connect serial programmer to the Apollo board
Now we are ready for the software setup
if you are doing this on a linux machine, you can directly follow the steps, on widows, you need to get the WSL first, check this post on how to install WSL
Software Setup
We need to get some python dependencies and the actual code we are going to load into apollo
sudo apt get-update

sudo apt install python3-pip

pip3 install pycrypto pyserial --user

curl -o tf.zip https://codeload.github.com/tensorflow/tensorflow/zip/aa47072ff4e2b7735b0e0ef9ef52f68ffbf7ef54

unzip tf.zip

cd tensorflow-aa47072ff4e2b7735b0e0ef9ef52f68ffbf7ef54

make -f tensorflow/lite/experimental/micro/tools/make/Makefile TARGET=sparkfun_edge micro_speech_bin

This will take time and will build required bin file
There will be some sections in pink color, showing some warning messages, these can be ignored
Now we are ready to prepare the binary file and load it to apollo
cp tensorflow/lite/experimental/micro/tools/make/downloads/AmbiqSuite-Rel2.0.0/tools/apollo3_scripts/keys_info0.py \

tensorflow/lite/experimental/micro/tools/make/downloads/AmbiqSuite-Rel2.0.0/tools/apollo3_scripts/keys_info.py
python3 tensorflow/lite/experimental/micro/tools/make/downloads/AmbiqSuite-Rel2.0.0/tools/apollo3_scripts/create_cust_image_blob.py \

--bin tensorflow/lite/experimental/micro/tools/make/gen/sparkfun_edge_cortex-m4/bin/micro_speech.bin \

--load-address 0xC000 \

--magic-num 0xCB \

-o main_nonsecure_ota \

--version 0x0
python3 tensorflow/lite/experimental/micro/tools/make/downloads/AmbiqSuite-Rel2.0.0/tools/apollo3_scripts/create_cust_wireupdate_blob.py \

--load-address 0x20000 \

--bin main_nonsecure_ota.bin \

-i 6 \

-o main_nonsecure_wire \

--options 0x1
export BAUD_RATE= 921600

export DEVICENAME=/dev/ttyS4
Now we can burn this bin to board using command.
python3 tensorflow/lite/experimental/micro/tools/make/downloads/AmbiqSuite-Rel2.0.0/tools/apollo3_scripts/uart_wired_update.py -b ${BAUD_RATE} ${DEVICENAME} -r 1 -f main_nonsecure_wire.bin -i 6
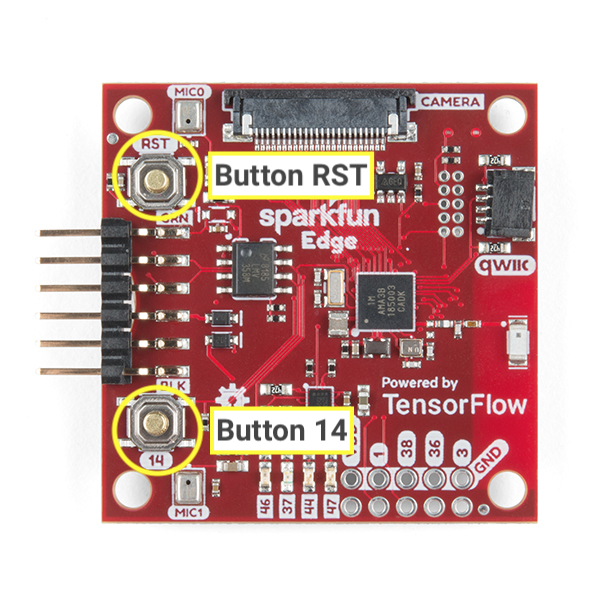
Take care of two buttons – button and button RST
Keep on holding button 14,
hit RST button,
hit enter with command
Keep on holding button 14

Check out the Codelabs guide for detailed explanation of steps
Related Posts


About The Author
Sivaiots
Enterprise Architect , Tinkerer
example code is available at
https://github.com/tensorflow/tensorflow/tree/master/tensorflow/lite/experimental/micro/examples/micro_speech