Getting Started with Intel D2000-Blinking LED
In this blog we will see how to setup development environment for Intel D2000 and write blinking LED program for it.
Features of the intel D2000:
- 8 KB Cache
- Operating Voltage 2.0V – 3.3V
- 32 MHz clock speed
- Optimized power management—low battery power
- 8 KB SRAM, 32 KB instruction flash, 8 KB OTP flash and 4 KB OTP data flash
- Scalable Intel® Quark™ Microcontroller Software Interface
- 2 channel DMA
- Intel® System Studio for Microcontroller SDK
You can download SDK from intel site.
You can create a new project by selecting File-> New -> Intel QMSI/BSP Project
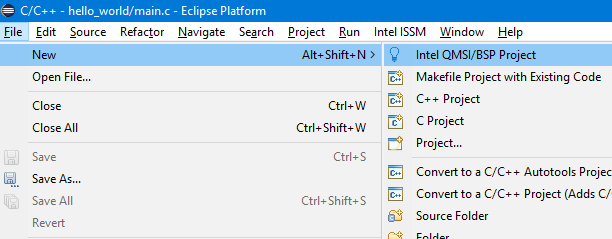
You will be presented with new project setup wizard. Give a name to your project (Blinking LED in this case) and choose a template(gpio for this project).

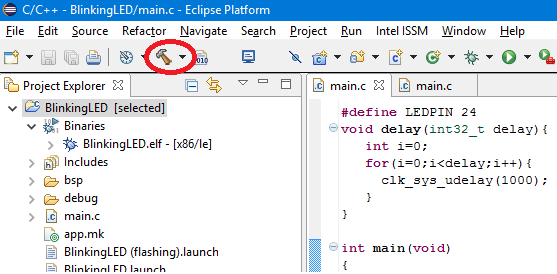
you can start editing the main.c, The file may have the example project code you may complete remove it or edit the same code.
/*

Connect your LED to Digital PIN 9, in the latest D2000 board there is onboard LED connected to this pin

*/

#include "qm_gpio.h"
#include "qm_interrupt.h"
#include "qm_scss.h"

#define LEDPIN 24
void delay(int32_t delay){
int i=0;
for(i=0;i<delay;i++){
clk_sys_udelay(1000);
}
}

int main(void)
{
qm_gpio_port_config_t cfg;
cfg.direction=BIT(LEDPIN);
qm_gpio_set_config(QM_GPIO_0, &cfg);

while(1){
qm_gpio_set_pin(QM_GPIO_0, LEDPIN);
delay(1000);
qm_gpio_clear_pin(QM_GPIO_0, LEDPIN);
delay(1000);
}
return 0;
}
You need to build the project in order generate the .elf, .hex files.
You can follow this blog to load the program to the board.


