ESP-IDF : Connected Servo – Control Servo from remote location
The real power of ESP32 is it’s ability to connect to the network. In the previous blog we have jut seen how to control the servo using ESP32, but haven’t done any activity on network. In this post we will see how to set the servo position from a remote machine.
Why we need this?
IoT is all about remote control and monitoring of devices. For example, one trigger action could be turning the motor on or off. By using servos, we can create this movement. Using ESP32 net work protocol (here we use UDP), we can send these commands remotely and complete the required actions.

Objective :
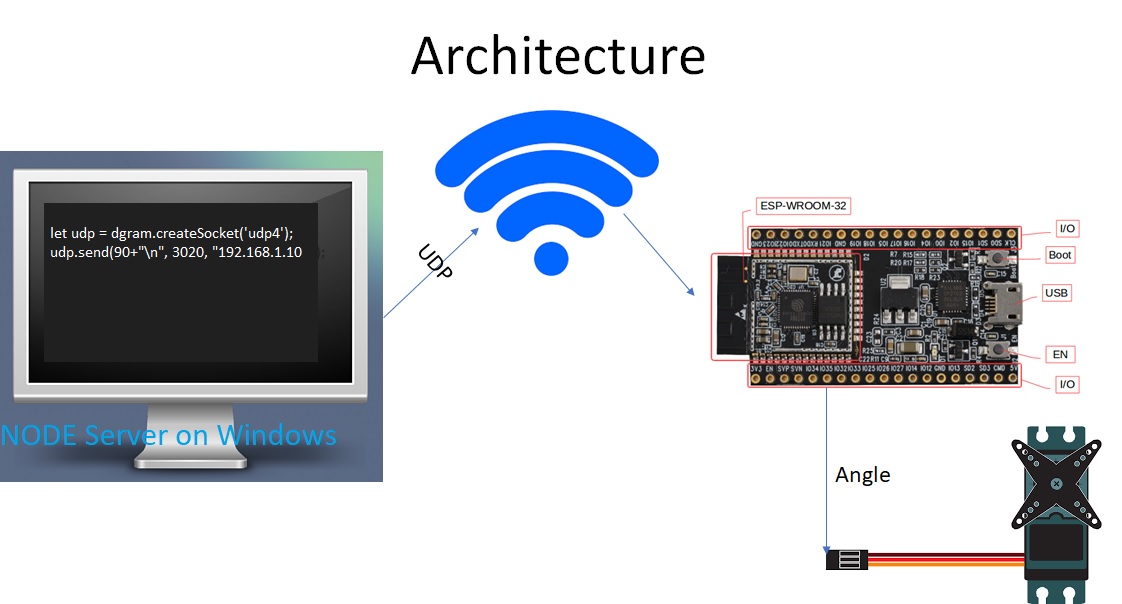
We will design a system which can receive commands on UDP port and set the position of the servo accordingly. We will use nodejs on a windows machine to send the commands. The command will not have any data other than the target angle of the servo (In production environment , it is advised to use some sort of data structure and some authentication mechanism). Though UDP is not reliable we are using this, as I am expecting this to be used in joystick kind of controllers , where the position data is continuously provided. Loosing a message in this type of scenarios doesn’t cause any damage to the system. If your application can’t tolerate loosing data, better use TCP or MQTT to transfer data.
Refer architecture diagram below
ESP32 code :
We will use LEDC to generate the required PWM, check out this post to know more about LEDC. The flow is simple,
- connect to specified WLAN
- Set the servo to 0 position
- open UDP socket on 3020 port, and wait for messages
- for each message received, convert it to integer and set the servo to given angle
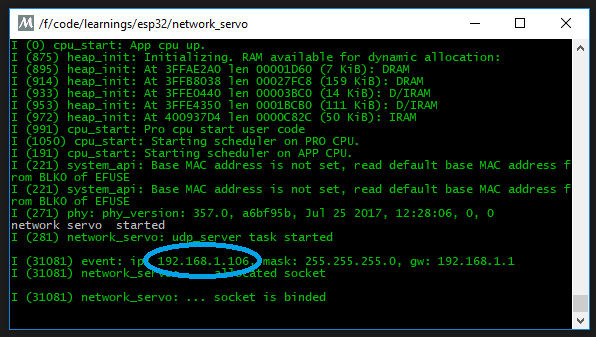
Code on available on this git repo , load the code to ESP32 and note down the IP , we need it in the next step. Connect servo signal line to GPIO16
On Nodejs side:
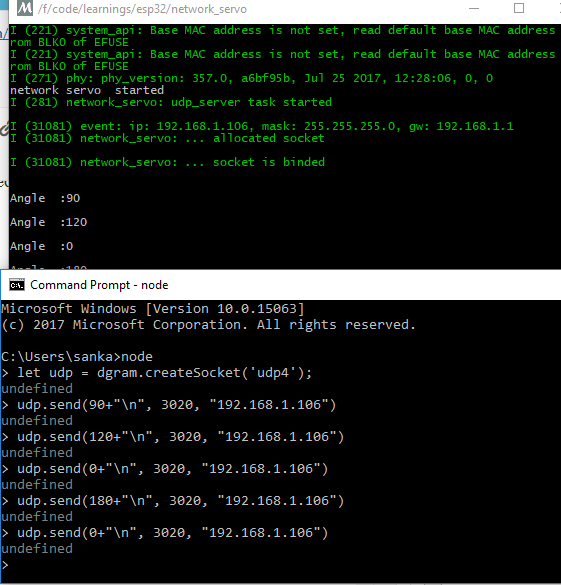
open node console and paste the following code in the console (make sure your computer and ESP32 are on the same network)
let udp = dgram.createSocket('udp4');
udp.send(90+"\n", 3020, "192.168.1.106");
First argument to the send function is the message we want to send, then we need to specify the port and finally the IP address of the ESP32.
you can send the UDP message from any platform that supports UDP, it can be even another ESP32 connected to the same network