Loading node mcu firmware to ESP8266-01
ESP8266-01 version comes with a AT based firmware, you need a application processor/controller to solve a problem.
if your use case doesn’t require lot of GPIO (ESP has only 2) you can load NodeMCU firmware and directly program the ESP. This way you can avoid having to add another controller.
In this blog we will see how to load the nodemcu firmware to ESP, it is actually pretty simple. You need ESP and a USB- Serial bridge (3v3 level). Many FTDI based serial bridges supports 3v3 option.
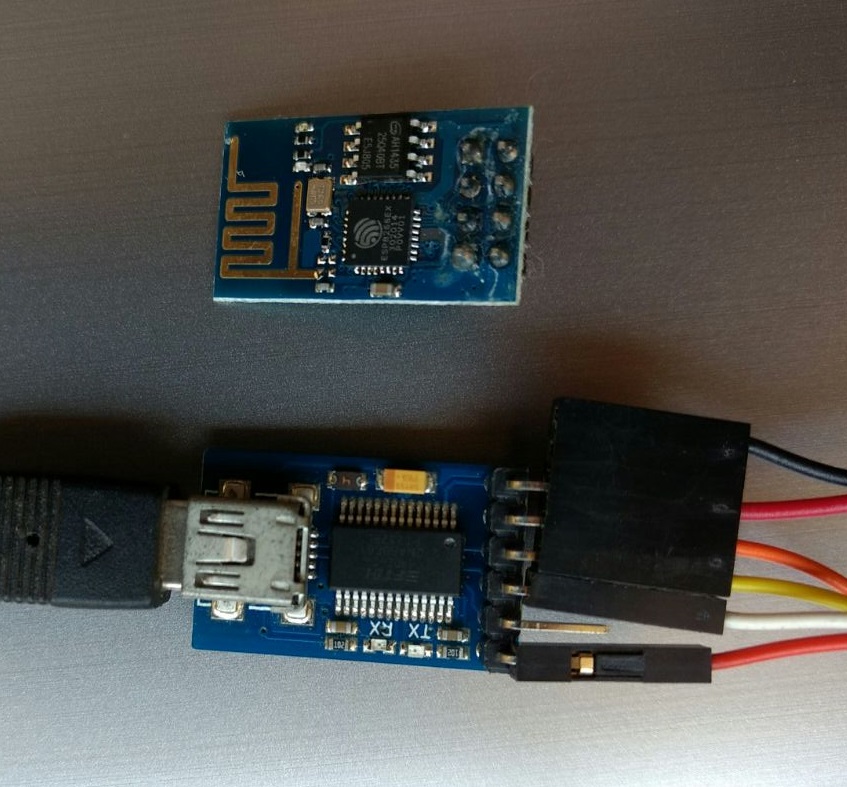
Connect ESP with Serial bridge.
ESP Connections:
VCC : 3v3 supply
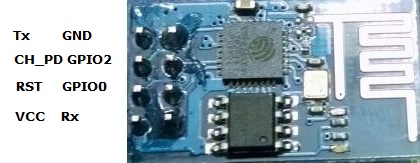
CH_PD : 3v3
TX : RX of Serial bridge
RX : TX of Serial bridge
RST,GPIO 0 : gnd
Connect the Serial Bridge ground to the supply ground.
Connect the Serial bridge to the PC and open the ESP8266 flasher.
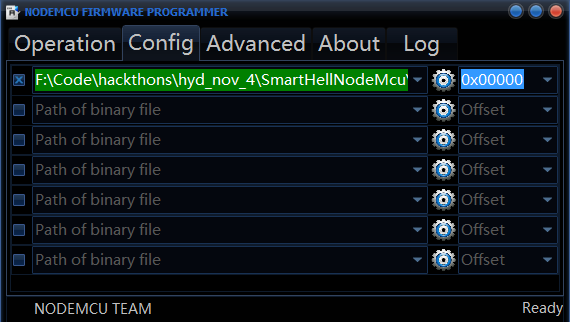
Select the firmware in config tab
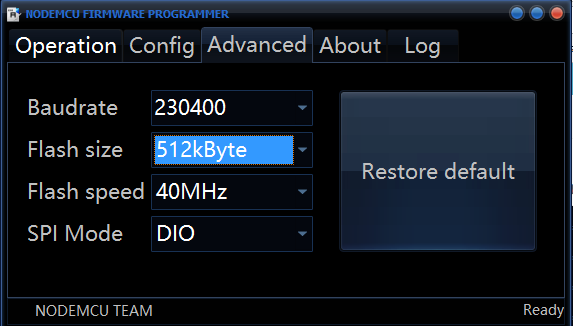
In advanced tab ,select the flash size, if your not sure about the flash size of your ESP, start from 512Kb
In operation tab select the COM port of the Serial bridge and click on flash. Once you have clicked on flash disconnect ESP RST pin from ground, then disconnect GPIO 0 from ground. The flashing will be completed in couple of seconds.


