My experiment with Windows10 IoT core
Visual studio:
20 years back (1995), when Microsoft first launched its visual studio 4.0 bundling its stand alone products Visual basic, visual C++ and foxpro, many jumped to install it (MSDN version at least, if not paid one) Now in 2015, There are many development IDEs available, but still there is demand for visual studio and preferred by many old timers. I downloaded and installed Visual studio 2015 community edition, as I understood it supports building Universal windows app.
Raspberry Pi
In the similar context, on the hardware side of exploration, Raspberry Pi is favorite starting point for many hobbyists.
Many IoT usecases are being explored on this system. RasPi supports many linux flavours and supports media centers.
Windows IoT core:
Microsoft launched the Windows10 IoT core to combine both the above items, Visual studio and Raspberry Pi. WIndows IOT core is slim version of windows 10 and can run a single app in “head” (Display). Visual studio 2015 supports to connect Raspberry Pi and deploy universal windows app to it.
What are the benefits of using IoT core
There are many Linux versions support RasPi, why single app on windows IoT core is required?
Basically Windows 10 IoT core allows to deploy C# projects to ARM architecture.
1. Existing knowledge pool of Visual studio programmers can be utilized to develop IOT applications
2. Applications which require minimal display capabilities and need to interact with Things, IOT core fits well
(classic use case could be ATMs and POS terminals running Windows XP can be easily replaced by this single app. WIndows XP is out of support and IoT core slim down version , so it will be cheaper)
Steps Involved in creating IoT core app on RasPi
1. One needs to have windows 10 OS to deploy the IOT core- So Windows 10 OS, Visual studio 2015 (Community edition will do, which is free for development purposes)
2. Raspberry Pi, and Formatted SD card
3. HDMI TV to check initial verification of RasPI booting
4. Optional keyboard , mouse (I used single keyboard mouse for my laptop and Raspi by switching)
5. Putty or powershell commands to control remotely Rasp.
– More details available in references section.
Issues:
1. Drivers for OS : There were few issues in drivers. So upgarde your sound card and display drivers first in native OS before upgrade
2. Wifi drivers for Rasp: Currently not many wifi drivers for Rasp is supported in IoT core. To avoid issues, I used LAN cable connection to my Rasp
3. There are few samples in IoT core now as compared to Linux flavour
4. iOT core Rasp lacks good audio drivers
References:
http://hackaday.com/2015/08/13/raspberry-pi-and-windows-10-iot-core-a-huge-letdown/https://www.hackster.io/windowsiot/projects
http://www.techrepublic.com/article/windows-10-on-the-raspberry-pi-what-you-need-to-know/
http://www.microsoft.com/india/diwaliupgrade/
http://ms-iot.github.io/content/en-US/win10/SetupRPI.htm
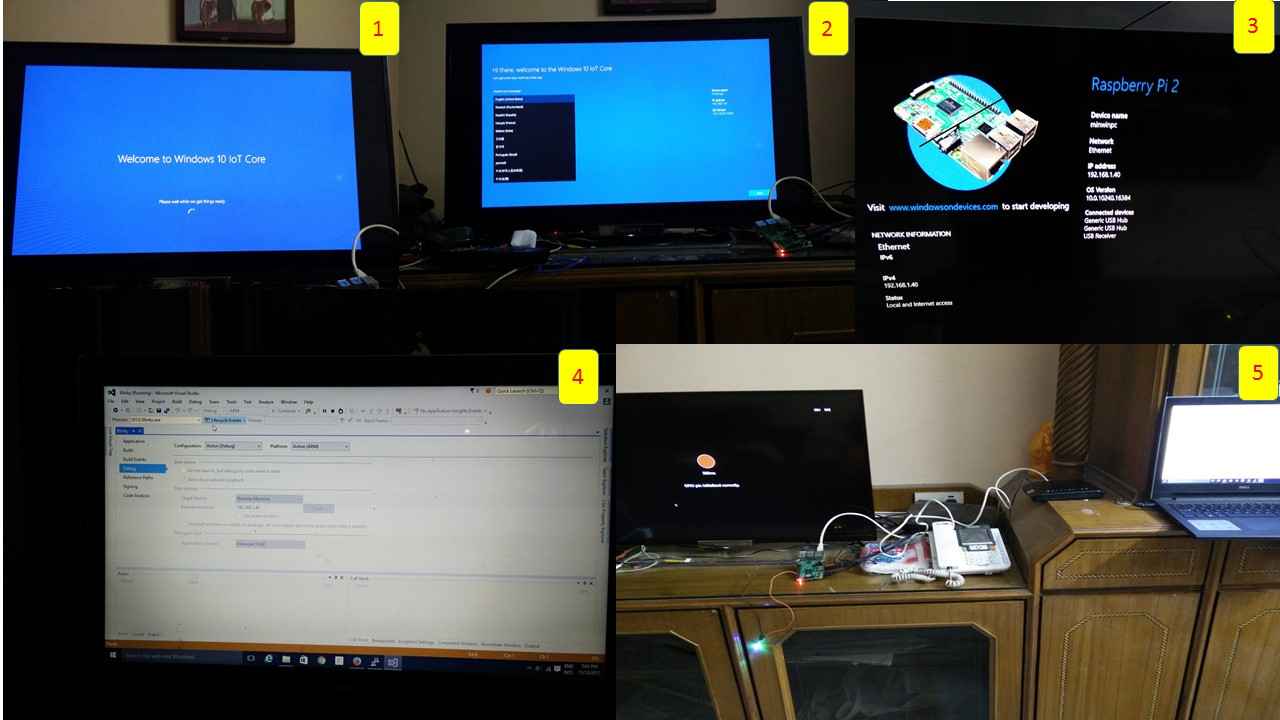
My Setup

Step 1,2: Booting up of Raspi on my LCD TV monitor
Step 3 : Raspi setup complete
step 4 Visual studio deployment to Rasp
step 5: Blinky demo


