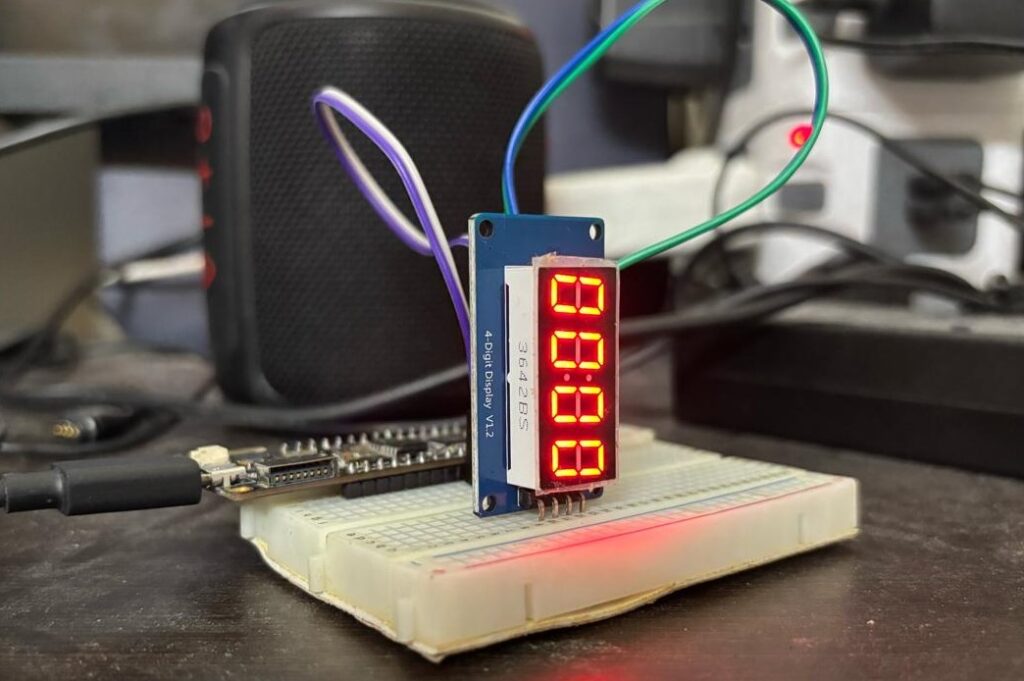
MicroPython : How to interface TM1637 with ESP32
TM1637 is versatile LED driver and keypad scanner chip. There are many 4 digit 7 segment display boards readily available in the market. In this post we will see how to connect TM1637 with ESP32 and show numbers on it. We have already developed CircuitPython code for circuit playground express, we can use the same code with minimal changes for ESP32.
What you need
- ESP32 based development board
- TM1637 based 4 digit 7-segment display
- jumpers for connecting TM1637 with ESP32 and PC to program ESP32.
if you haven’t already loaded MicroPython on to ESP32, See how to install micropython on esp32 post.
Objective
We would like to show numbers on 7 segment display using TM1637 and ESP32. we will be using MicroPython to program the ESP32 module.
Solution approach
We will be developing methods to send data to TM1637 using bitbang method by following two wire TM1637 interface protocol. Then using these methods, we will display the numbers we want on the 7-segment display.
Connections
| ESP32 dev board | TM1637 Display Board |
| 3V3 | VCC |
| GND | GND |
| 22 | CLK |
| 19 | DIO |
MicroPython Code For TM1637
Code is very similar to circuit python code. We changed the IO control code and sleep code. The basic units of interface protocol are start,stop and write byte.
The wire protocol is very similar to I2C, to send data first we need to send a start bit, followed by the byte and finally stop bit. The _SEGMENTS array has the hex control code for each decimal digit 0-9, this control code tells TM1637 which segments need to be on and which segments need to be off.
We have forever loop calling the showNumber method with 1 second delay. We are also incrementing the count value in each loop iteration.
The showNumber method is converting the given number 4 character length string (it will add 0s if the given number doesn’t have 4 digits). For example if we give number 10, it will be converter to string “0010”. Then we are encoding each digit with corresponding hex 7 segment display code present in the _SEGMENTS array. The resulsted encode string is being sent out to the TM1637 using write method.
import time
from machine import Pin

_CMD1   = 0x40      # data command
_CMD2   = 0xC0      # address command
_CMD3   = 0x80      # display control command
_DSP_ON = 0x08      # display on
_DELAY  = 100  # 100us delay between clk/dio pulses
_MSB    = 0x80      # decimal point or colon depending on your display
_clk = Pin(22, Pin.OUT)
_dio = Pin(19, Pin.OUT)
# 0-9
_SEGMENTS = bytearray(b'\x3F\x06\x5B\x4F\x66\x6D\x7D\x07\x7F\x6F')
_clk.value(0)
_dio.value(0)
_brightness = 7
time.sleep_us(_DELAY)

def _start():
    _dio.value(0)
    time.sleep_us(_DELAY)
    _clk.value(0)
    time.sleep_us(_DELAY)

def _stop():
    _dio.value(0)
    time.sleep_us(_DELAY)
    _clk.value(1)
    time.sleep_us(_DELAY)
    _dio.value(1)

def _write_byte(b):
    for i in range(8):
      _dio.value((b >> i) & 0x01)
      time.sleep_us(_DELAY)
      _clk.value(1)
      time.sleep_us(_DELAY)
      _clk.value(0)
      time.sleep_us(_DELAY)
    _clk.value( 0)
    time.sleep_us(_DELAY)
    _clk.value(1)
    time.sleep_us(_DELAY)
    _clk.value(0)
    time.sleep_us(_DELAY)

def _write_data_cmd():
    # automatic address increment, normal mode
    _start()
    _write_byte(_CMD1)
    _stop()

def _write_dsp_ctrl():
    # display on, set brightness
    _start()
    _write_byte(_CMD3 | _DSP_ON | _brightness)
    _stop()

def brightness(val=7):
    _brightness = val
    _write_data_cmd()
    _write_dsp_ctrl()

def write( segments, pos=0):
    _write_data_cmd()
    _start()

    _write_byte(_CMD2 | pos)
    for seg in segments:
      _write_byte(seg)
    _stop()
    _write_dsp_ctrl()

def encode_char(char):
    o = ord(char)
    if o >= 48 and o <= 57:
      return _SEGMENTS[o-48] # 0-9
    raise ValueError("Character out of range: {:d} '{:s}'".format(o, chr(o)))

def encode_string(string):
    segments = bytearray(len(string))
    for i in range(len(string)):
      segments[i] = encode_char(string[i])
    return segments

def showNumber(num):
    string = '{:04d}'.format(num)
    print(string)
    write(encode_string(string))

if __name__ == "__main__":
  print("TM1637 interface")
  _write_data_cmd()
  _write_dsp_ctrl()
  count = 0
  while True:
    count = count + 1
    print(count)
    showNumber(count)
    t = time.localtime()
    time.sleep(1)
How to test
Connect ESP32 board to PC and open MU editor. Create a file called main.py and paste above code. Save the file and transfer the file to ESP32 using “Files” icon. Then reset the board, the display will show the count of seconds. We can also just click on the “Run” button, the code will be transferred to the board and executed.


